If you are planning to move your installation of AutoCorrect to a new, replacement or reset device then you can take advantage of the software's built-in Backup feature to take your corrections list and settings with you.
To do this, please follow the steps below. Please note: You will need to make sure these steps are completed before removing AutoCorrect from the original device and/or resetting the original device.
On the original/old device:
1) In the AutoCorrect main window, click on 'Settings', then 'General'.

2) Under the 'Backup AutoCorrect list and settings' tag, click the 'Backup' button.

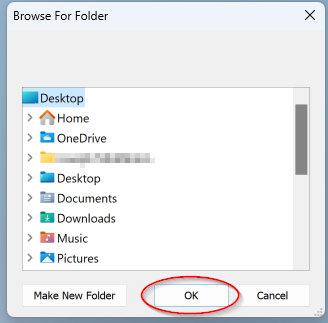
3) You will be prompted to select a folder to save your backup to. You can choose any folder of your preference, just make sure it is somewhere you can easily find the file in later (e.g. Desktop, Documents). Once selected, click 'OK'.

4) Find the file in the location you selected. It will be named 'AutoCorrect-...' followed by the date and time of your backup, and it uses the extension '.db' (database file).
5) Transfer this file to your new/replacement device via your preferred transfer method (USB, email, cloud storage etc.)
If you are resetting the device you are on currently, then just save the file temporarily somewhere that will not be wiped in the reset, such as on a USB Drive or in cloud storage.
As before, make sure the location you transfer it to is memorable as you will need to find it later.
On the new/replacement device:
1) In the AutoCorrect main window, click on 'Settings', then 'General'.

2) Under the 'Restore AutoCorrect list and settings from a backup' tag, click the 'Restore' button.

3) You will be prompted to select a file to restore from. This should be the file you saved earlier and transferred to this device. Once selected, click 'Open'.

4) AutoCorrect will now restore your corrections and settings. This may take a few moments. Once completed, you should now see your corrections list and settings from your previous device on your new/replacement device.
If you need to move to a new/replacement/reset device another time in the future, we recommend completing the above steps again so the backup file you use is the most up-to-date, as it will always only backup the corrections/settings you have at the date and time of clicking the 'Backup' button.