Thank you for your purchase of Claro School Home and Go.
With your license, you will have access to ClaroRead and ClaroRead SE for Windows and Mac, ClaroRead extension for Chrome/Edge, Claro cloud apps and Equatio.
This guide will help you in setting up and configuring the software.
Setting up the Claro cloud and accessing the software installers
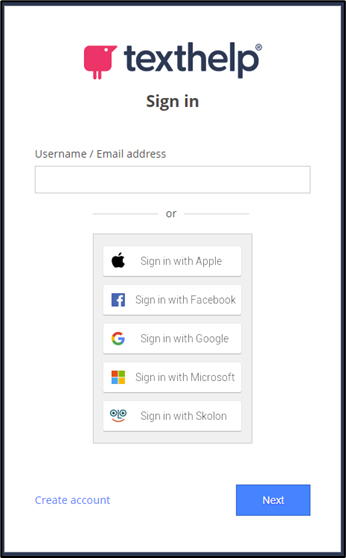
Go to www.clarosoftware.com/login, then click on Create Account if you wish to manually create your account OR if your domain is provided through Google or Microsoft, you can use the single sign on option.
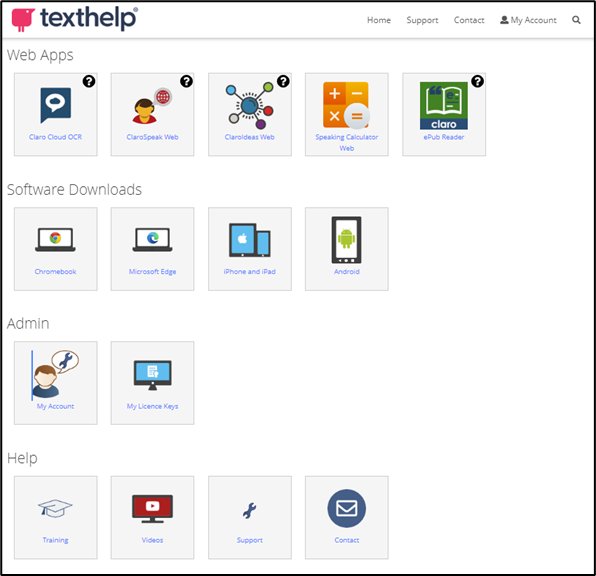
 Once you are signed in to Claro cloud, navigate down to Admin and then My Licence Keys.
In the My Licence Keys section, you will be able to add your licence key/product code.
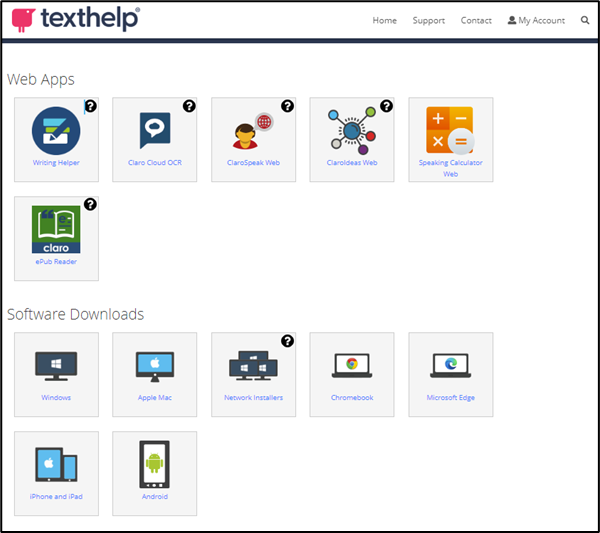
 Once you have entered this key, you will now see your full feature set appear on your Claro cloud homepage.
This includes our Web apps and software downloads.

Our web apps include:
Claro Cloud OCR
This will allow you to convert inaccessible text documents, PDFs and images into accessible text documents.
https://support.texthelp.com/help/claro-cloud-ocr-user-guide
ClaroSpeak Web
ClaroSpeak web will let you type and dictate text into our online reader.
This also comes with the function to upload documents and work on these online as well.
https://support.texthelp.com/help/clarospeak-web-user-guide
ClaroIdeas Web
ClaroIdeas is our mind mapping software.
The ClaroIdeas web is a simplified version of our Windows desktop software of the same name.
https://support.texthelp.com/help/claroideas-web-user-guide
ePub Reader
The ePub reader will allow users to import ePub books to have these read aloud for them.
https://support.texthelp.com/help/claro-epub-reader-user-guide
Accessing the software installers, where to use them and install guides
ClaroRead
When installing ClaroRead, you will have two options for the type of install you will use: Single or Network.
Single user installation will require a product key to activate and these installers are designed to be used on take home devices.
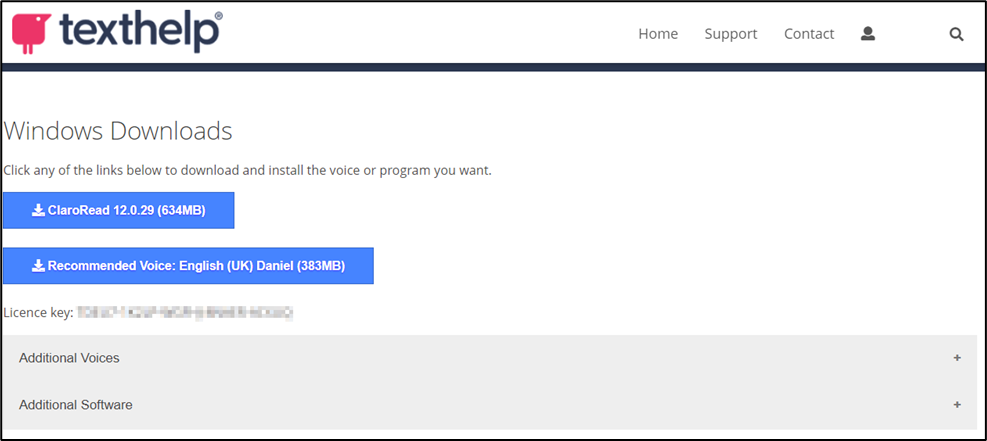
These installers are downloaded from the “Windows” and “Mac” icons in Software Downloads.
Your single user installation key will be found inside the “Windows” and “Mac” download options (see image below)
This key should only be used on take home devices.
 https://support.texthelp.com/help/claroread-installation
Network installation will not require a product key to activate and these are intended to be deployed using your distribution software (such as GPO) on the school devices.
This installer will not require a key to activate and should only be used on internal devices.
Network installers should not be used to install ClaroRead onto a take home machine.
Your network key can be found in My Licence Keys.
https://support.texthelp.com/help/installing-claro-software-on-your-network
ClaroRead Take Home Self Service
You may want to set up a self service method for students and parents to install ClaroRead on their personal devices.
This can be done in a few different ways and you will need to choose the best method for your institution.
Link from your own website’s user system (Recommended)
If your users already log in to your website using a username/password, then you can simply link from your website to our Claro Cloud services and apps. All you have to do is register the URL or URLs from which the users will be coming – that is, the page on which you’ll put the links to Claro Cloud. You do this by logging in to Claro Cloud and selecting the Manage Referrers option. This will bring up a simple text entry form:
Enter the URL or URLs from which your users will come and click Add. You will then see the referrer URL listed. For example, the University of Westhaven has a student e-learning system at www.westhaven.edu/students. The Westhaven administrator puts the links to the Claro Cloud services on a page at www.westhaven.edu/students/apps.html, and registers www.westhaven.edu/students/ URL in Manage Referrers. Now students can log in to the Westhaven site and simply follow the links on the www.westhaven.edu/students/apps.html page to the Claro Cloud apps and services: no additional log-ins are required.
Link directly from your website to the URLs provided in Manage Referrers. If in doubt, use ClaroSpeak Web.
Help finding out your referrer ID: If you you’re confused as to what your referrer ID should be, follow these simple steps:
1. On your webpage where you want to link to ClaroRead Cloud, put a link to https://www.clarospeakweb.com.
2. Follow the link and you’ll see the ClaroSpeak Web sign-in page.
3. Do View Source in your web browser.
4. Immediately after the body tag you’ll see an HTML comment with the referrer ID from your web page. This is the value you put into Manage Referrers.
You can get more information about how the referrer URL is used by clicking “What is this?” in Manage Referrers.
You can track usage across all your users in Claro Cloud, but you will not be able to break out individual users.
Distribute a username and password to your end users
You may find it simpler to have a username and password to give out to your users. You can get this from your admin Cloud account.
1. Log in to Claro Cloud.
2. Click on Student and Staff Access.
3. Set the password you want to use and (optionally) change the default username.
4. Click Submit.
You can now simply give the username and password to your staff and students and point them at the Claro Cloud login page at https://www.clarosoftware.com/login. When they log in they will see downloads and web apps but not all your admin functions.
Using Single Sign On (SSO)
This option is available if you use Google or Office 365 as your Identity Provider.
If you do, you can simply instruct your users to sign in with their normal work or college account. You will have to log in first to tell Claro Cloud that the email domain for your users is associated with Google or Office 365, then you are good to go!
You can set this up using Domain Admin.
Single sign on is only available for licenses with an attached multi-user key and School Home and Go.
ClaroRead For Chromebook/Chrome Browser
Users can access the ClaroRead extension for Chrome and Edge from the extension store (this can also be pushed out using InTune/GPO or Google Admin Console)
Your staff and students can then activate the extension to receive premium features using one of the following methods:
Sign in with their email
To sign in with their emailaddress (either in the extension options OR by being signed into the browser with sync enabled) you will need to add your domain to the Domain Admin tool under Admin in the Claro cloud account.

Inside the Domain Admin tool, after adding your domain (and selecting Google or Office 365) you can then also set the default settings for your users.
Sign in with Staff and Student access
To sign in using the Staff and Student login, you will need to set up the Staff and Student login under the Admin section in the Claro cloud account.
Staff and students can then activate the premium features by opening the ClaroRead extension and going in to the Settings>Account and using these log in details.
Claro Mobile apps
Staff and students will be able to download and use our Claro apps on their mobile devices.
The apps available are:
iOS
Claro ScanPen
ClaroSpeak
ClaroCom
Orbit Note
To unlock the premium features of these apps, the users will need to download the free version of the apps (these may dictate “in app purchases available”)
Then they will be able to log in using the “staff & student login” (this will need to be set up from the Claro cloud admin account)
There is additional support for installing iOS apps onto multiple Apple mobile devices at once here: https://support.texthelp.com/help/installing-claro-ios-apps-on-multiple-iphonesipads
Android
Claro ScanPen
Users can also access ClaroSpeak and ePub reader, but they will need to access these through the Claro cloud in their mobile browser.
They will be able to add these web apps to their mobile desktop as an icon for quick access in the future.
To do this, we have a guide to support users on setting this up: https://support.texthelp.com/help/adding-claro-web-apps-to-your-android-device
Writing Helper
To access Writing Helper, your staff and students can go to https://writinghelper.texthelp.com/SignIn in their preferred browser on their Mac or Windows computer.
Once they are here, they will be prompted to sign in using a Google or Microsoft account.
If your domain is supported by Google/Microsoft SSO, they will be able to log in to Writing Helper using their school email domain email.
Please be aware, this domain must match the domain that we hold against your licence key.
If your domain is not supported by Google/Microsoft SSO, you can deploy our Writing Helper Web Launcher.
You will need to download https://download.clarosoftware.com/writing-helper-web-launcher/WritingHelperWeb-engb-1.0.0-auth-X.zip
Then you will need to deploy the MSI and include the parameters: msiexec /i (location of the MSI) LICENCEKEY=(your licence key goes here) /qn
This will install the Writing Helper web launcher, and when this is run it will open Writing Helper web and activate the web app against your site licence.
Equatio
If your organization uses G Suite or Microsoft and all of your end users have Google or Microsoft Office 365 accounts that they can sign into the Equatio application with, then Texthelp recommends using Deployment A.
If your organization does not use G Suite or Microsoft and your end users do not have Google or Microsoft accounts Office 365 accounts to sign into the Equatio application with, then Texthelp recommends using Deployment B.
Deployment A
Your organization uses G Suite or Microsoft and all end users have a Google or Microsoft Office 365 accounts
To deploy Equatio so your users can sign in to Equatio with Google or Office 365 accounts:-
1. Go to the Equatio download page
2. Select the Equatio MSI
3. Deploy the Equatio application across your network using your preferred software deployment methods
When your end users launch Equatio, they will be asked to sign in using their Google or Office 365 account.
Deployment B
IMPORTANT: Equatio must be installed on the computer before installing the Multi-User Setup Tool.
Go to the Equatio download page
1. Select the Equatio MSI
2. Deploy the Equatio application across your network using your preferred software deployment methods
How to set up Equatio on a network of computers
1. Download the Multi-User Setup tool and run the Equatio Multi User Setup.exe. This will install the application to your computer and when finished, you’ll find a shortcut to the application on your Desktop.
2. Run the Equatio Multi-User Setup.exe and the Welcome screen will appear.
3. Click the Get Started button
4. Enter your Product Code. This can be found in your onboarding email received upon purchasing Equatio.
5. Choose where you would like to save the MSI that will be created. This will default to your desktop.
6. Click Create
7. Deploy this MSI along with the Equatio software across your network using your preferred deployment methods. When your end users launch Equatio, they will not be prompted to log into the program.
ClaroRead for Exams
For exams, we recommend ClaroRead SE.
This is because SE will perform the basic functions for screenreading and does not offer any additional resources that may give an unfair advantage during an exam.
In some instances, students may require the dictation function.
In these instances, you can download the School specific ClaroRead SE which includes dictation: https://www.clarosoftware.com/download/claroreadseexams
Please be aware that this version should ONLY be used on internal exam devices.
ClaroRead uses the default Windows dictation software.
- Ensure the URL Websockets.platform.bing.com and westus.api.cognitive.microsoft.com URLs can be accessed from within your network
- To do this from the command prompt run nslookup websockets.platform.bing.co
- To do this from the command prompt run ping westus.api.cognitive.microsoft.com
WSUS may block language pack downloads, so GPO may need to be altered to allow features from windows updates.
If you wish to use your standard ClaroRead installation, you can do this and disable the spellcheck and homophone checking in ClaroRead.
To do this, you can set a registry value to disable spellcheck and homophone checking in any ClaroRead installed on the machine:
• Registry key HKEY_LOCAL_MACHINE > SOFTWARE > Claro Software or HKEY_LOCAL_MACHINE > SOFTWARE > WOW6432Node > Claro Software
• Add a String value (REG_SZ) called DisableSpellcheck with a value of TRUE
This means that you can use Group Policy to install ClaroRead on a set of machines in an examination room and at the same time disable spellcheck for any user on those machines.
• This applies to any user on the machine.
• ClaroRead for Windows only.
• ClaroRead 7 and later versions.
• The speaking dictionary is still available.
• Prediction is still available.
If you are using ClaroRead Chrome for your exams, you will need to use the Domain Admin in your Claro cloud account.
These settings will be able to be enabled/disabled and then locked from your admin login.
Users then signing in using the domain will now see these options and will be unable to change these.