This guide will show you how to deploy ClaroRead using Windows Server 2022. This guide assumes you are familiar with how to operate your Windows network, that you have already setup Windows Server 2022 and have configured your users and groups in Active Directory. Windows Server 2019 is very similar.
We use Microsoft Windows Installer MSI files for all our installers so they work well with Windows networks and they all install in a similar way.
Setting up a share
The first step to distributing ClaroRead across a network is to provide a shared location from which clients can access the ClaroRead setup files. If there is not already a shared folder set up for this purpose then one can be created in the following manner:
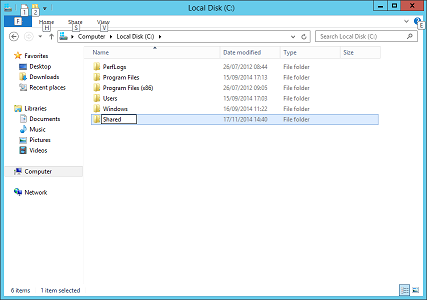
Create a folder in a suitable location with a suitable name
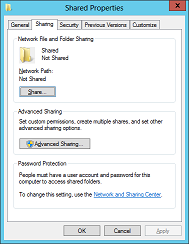
Right-click on the new folder and select Properties
In the properties dialog select the ‘Sharing’ tab and then click on ‘Advanced Sharing…’
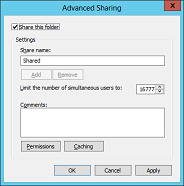
Tick ‘Share this folder’ and then click on the ‘Permissions’ button
Add the ‘Read’ permission to users or groups that should be able to install ClaroRead
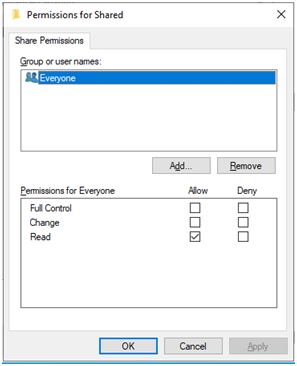
‘OK’ all of the dialogs and open the new folder in Windows Explorer
Create any further folders desired to make it easier to manage the file system
Download the files you want to deploy from the ClaroRead website (www.clarosoftware.com/login > Network installers).
Copy all files in this folder to the new shared folder
Setting up the distribution script
Once the files are in a suitable shared location use the following steps to distribute them across the network:
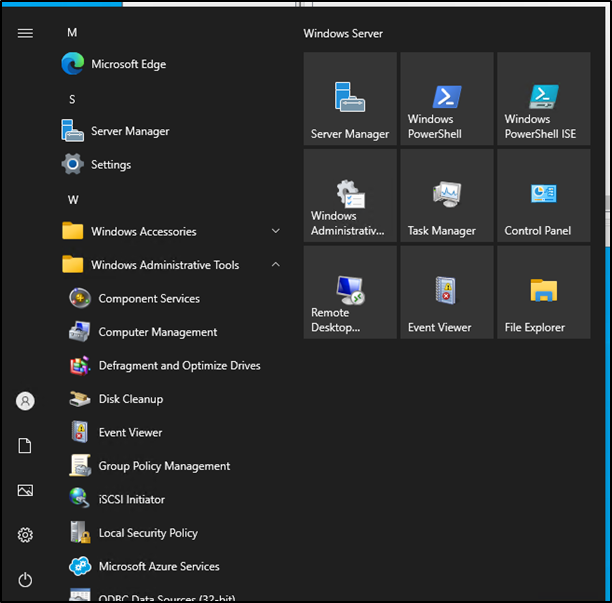
Open up the ‘Group Policy Management’ window by going to ‘Start Screen’ and locating the Group Policy Management icon.
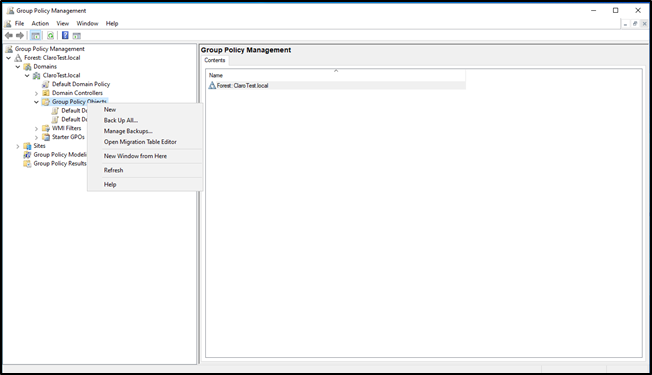
 Expand ‘Forest: [The Forest] > Domains > [The Domain]’. Right-click on ‘Group Policy Objects’ and select ‘New’
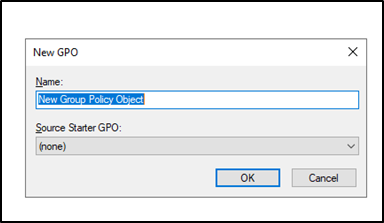
Enter a suitable name for the new policy (e.g. ClaroRead Install Policy) and leave ‘Source Starter GPO’ as ‘(none)’
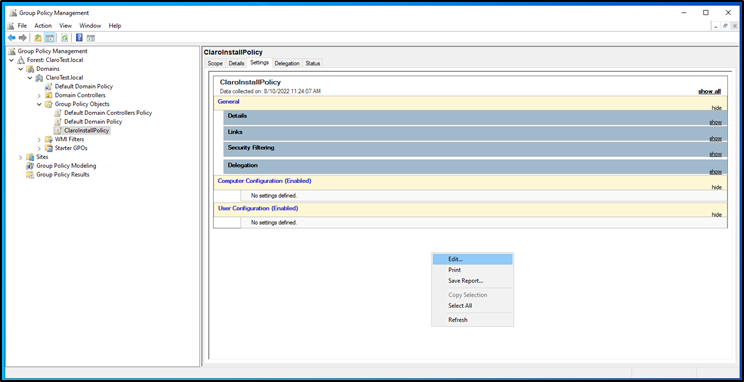
Click on the new policy and then select the ‘Settings’ tab from the right-hand pane. In this tab are 2 configuration headings: ‘Computer Configuration’ and ‘User Configuration’. Right-click anywhere in the panel and select ‘Edit…’
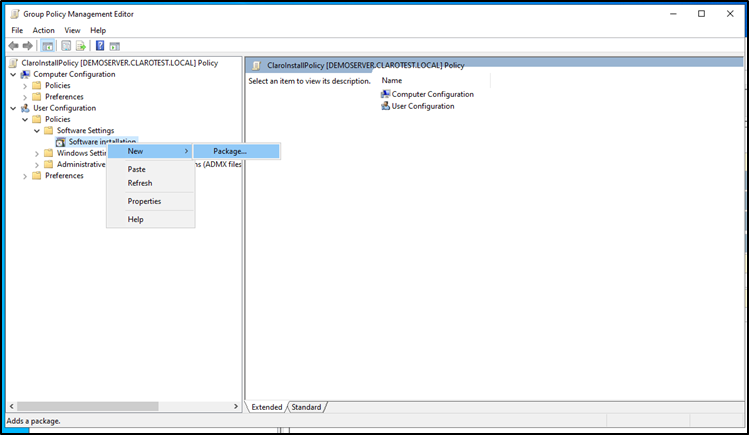
Expand ‘User Configuration > Policies > Software Settings’, right-click on ‘Software installation’ and select ‘New > Package…’
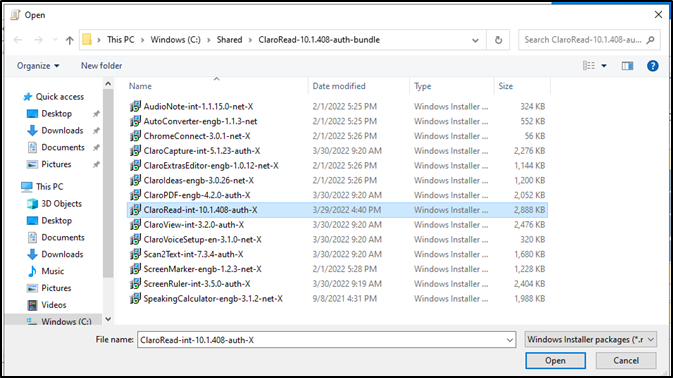
Select the network location of the ClaroRead installation files
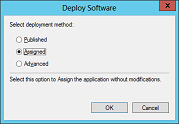
In the dialog that appears select ‘Assigned’ and click ‘OK’
The selected installer will appear in the ‘Software installation’ panel. (This might take a couple of minutes to happen)
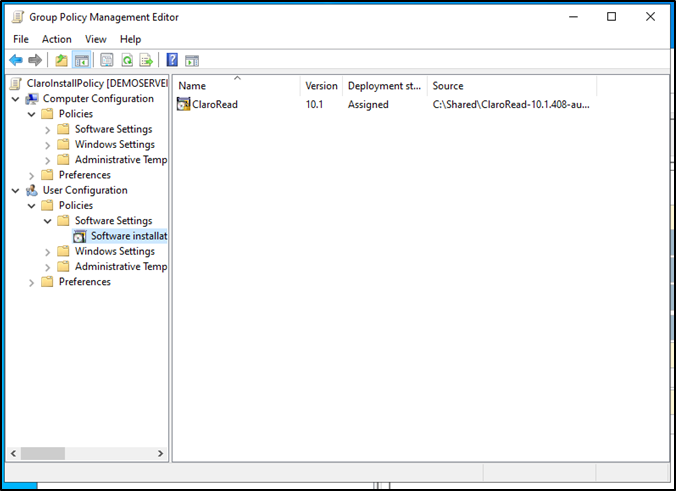
When the package does appear, double-click on it to open properties and then select the ‘Deployment’ tab.
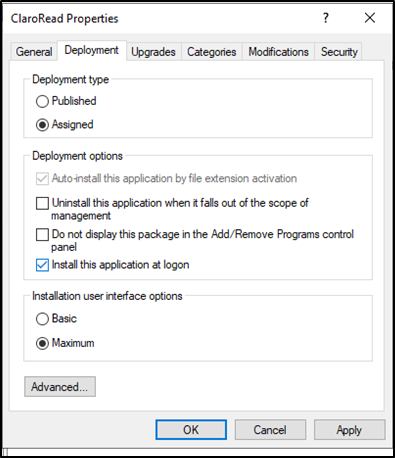
Tick ‘Install this application at logon’ and select ‘Basic’ for the user interface. Click ‘OK’
If installing individual components from the ClaroRead software (ScreenRuler, ClaroView etc.), you will repeat steps 5-10 for each instance you are installing.
Close the ‘Group Policy Management Editor’ window and return to the ‘Group Policy Management’ window. Right click on the domain name in the tree and select ‘Link an Existing GPO…’ from the drop-down.
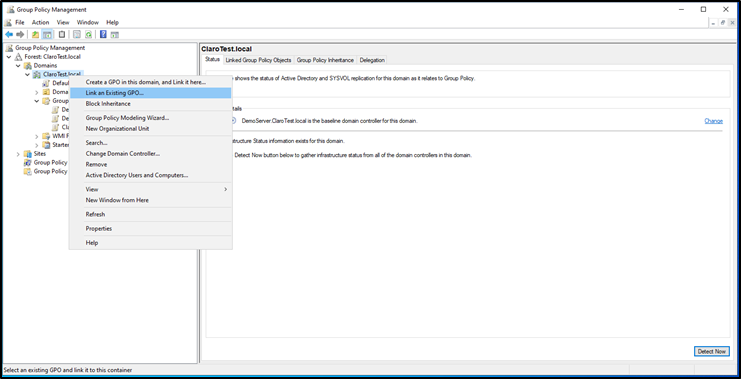
Select the new policy from the list and click ‘OK’
ClaroRead should now install on users’ computers when they log in.
