The Texthelp Admin Tool can be used to manage which users will have access to Read&Write on these platforms - Windows, Mac, Google Chrome, Microsoft Edge, iPad and Android
This information is for Read&Write Group Licenses and doesn’t apply to Unlimited Licenses.
Important: Google Domain
If your organization uses G Suite, the Texthelp Google Admin Tool should be used to manage your Read&Write group.
Please Note:- The Texthelp Admin Tool should not be used when using the Texthelp Google Admin Tool. Using the Texthelp Admin Tool may result in your users losing premium access.
Other Domains
If your organization doesn’t use G Suite, the Texthelp Admin Tool must be used to manage your Read&Write group.
Adding users to your Read&Write Group
1) Go to the Texthelp Admin Tool.
2) Enter your Read&Write Product Code and click Continue.
3) Click on the provider you want to login with using the technical contact details you provided when purchasing Read&Write.
4) Select or enter the login details for the account you want to use.
5) Accept the permissions.
6) To add multiple email addresses, click on Manage Group, and select the option that you’d like to use to add the email addresses.
7) To add a single email address to the group, click on the Quick add/remove option under Manage Group.
8) Enter the email address you’d like to add and click on Add.
Removing users from your Read&Write Group
If you want to remove a number of users from your Read&Write group, a new CSV file containing only the users you want to be part of the Read&Write group can be uploaded. This will remove any users who are currently listed in the Read&Write group, but who are not in the new CSV file you upload. To do this:
1) Go to the Texthelp Admin Tool.
2) Enter your Read&Write Product Code and click Continue.
3) Click on the provider you want to login with.
4) Select or enter the login details for the account you want to use.
5) Accept the permissions.
6) To add multiple email addresses, click on Manage Group, and click on via CSV file.
A single email address can be removed from the Read&Write group by following the steps below:-
1) Click on the Quick add/remove option under Manage Group.
2) Enter the email address you’d like to remove and click on Remove.
Checking How Many Users You Have
Please note: Due to our privacy policy email addresses are de identified in our system and cannot be viewed in the Texthelp Admin Tool.
The type of license, number of seats, and number of users you’ve enrolled in the Read&Write group can be found on the Home page of the Texthelp Admin Tool.
Format of CSV file
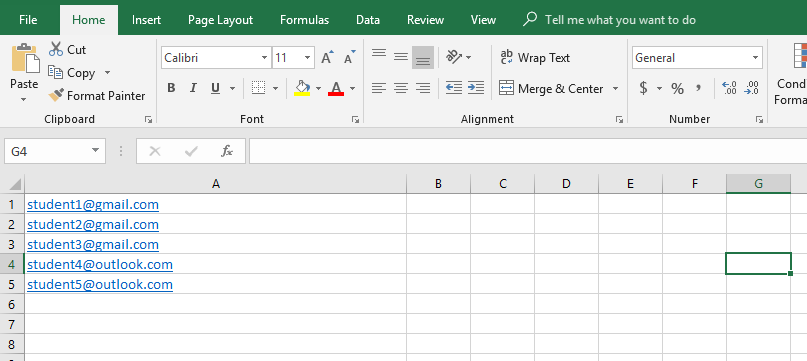
The CSV file should contain a list of the email addresses you want to add to the Read&Write group.
For example:

Please note: All users who are to be licensed must be on the CSV file including existing users. Once the file is uploaded any existing users in the group who are not listed on the uploaded CSV file will be removed from the group. It is recommended to add new users to a CSV file with existing users to maintain the list of licensed users.
Additionally, any users that were added using Quick add/remove will also be removed if they're not on a current CSV file that's uploaded.
Once you've finished setting up your group, proceed to Deploying Read&Write.
Please click the appropriate product below: