Overview
The Texthelp Google Admin Tool is a Chrome extension that allows G Suite administrators and Groups admins to manage and license group licenses across all Read&Write platforms:
Read&Write for Google Chrome, Read&Write for Windows, Read&Write for Mac, Read&Write for iPad, Read&Write for Android
If Your Organization Also Has Licensing for EquatIO™:
In addition to Read&Write, EquatIO groups can also be setup and managed using these instructions.
Important!
- If your organization does not use G Suite for Education, you should not use the Texthelp Google Admin Tool. You should instead use the Texthelp Admin Tool to manage and license your group users. Click the link for Setting up your Group License - Texthelp Admin Tool for instructions.
- Please contact support@texthelp.com if you have any questions.
- For Read&Write for Google Chrome with Office 365, click the link for Setting up your Group License - Texthelp Admin Tool
Add the Texthelp Google™ Admin Tool extension from the Chrome Web Store
Installation
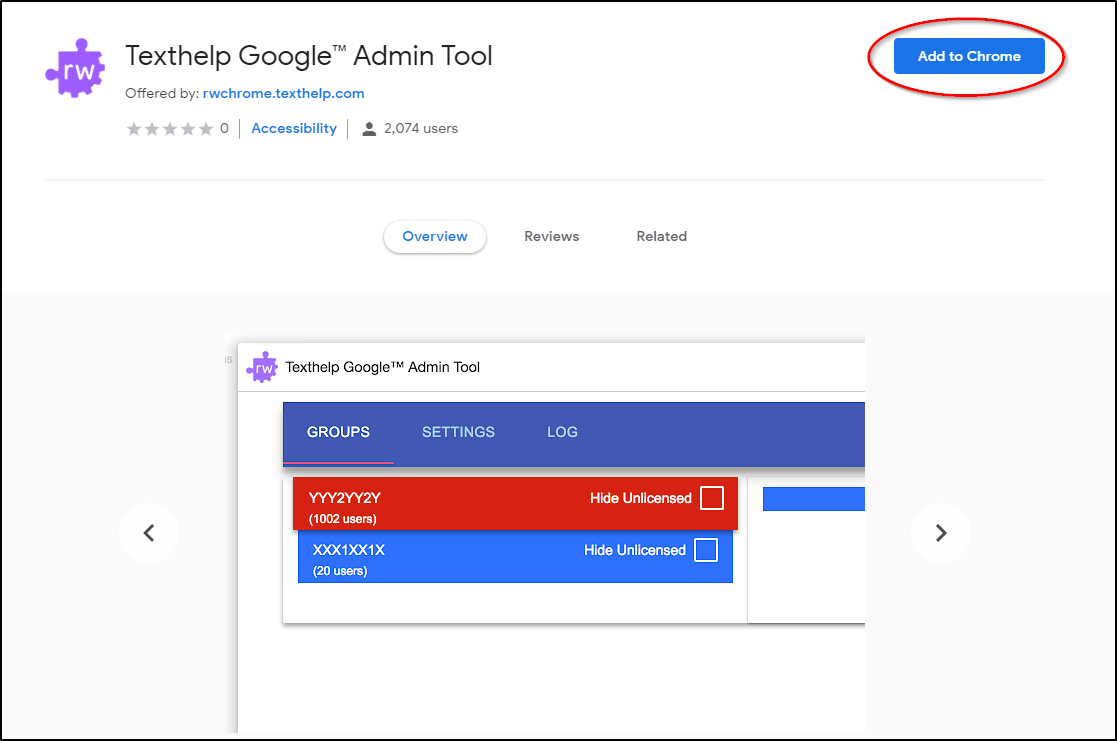
The Texthelp Google Admin Tool can be added from the Chrome Web Store. You must be logged into the Chrome browser and the Google Admin Console with at least a Groups Admin account when adding the Texthelp Google Admin Tool

Click Add extension to add to Chrome
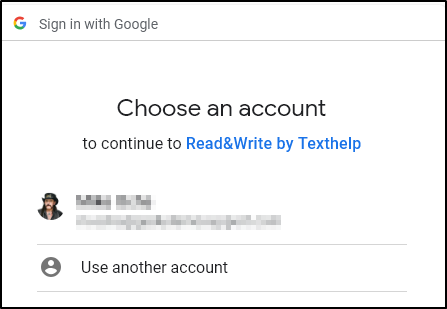
The first time you click on the Texthelp Google Admin Tool icon you will be asked to choose an account

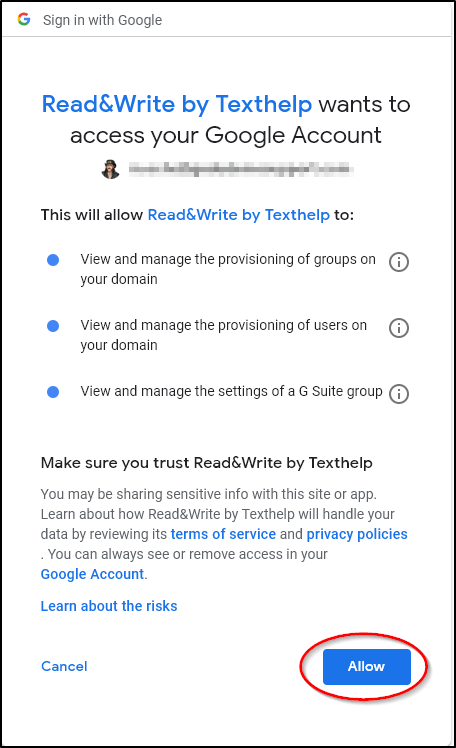
Select your account and it will display the permissions dialog. These permissions are required to use the tool

Click Allow to grant permissions
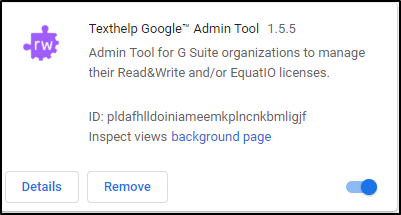
Once added, the tool icon will then be found in the Chrome toolbar
![]()
If the icon does not appear,click on the three dots to the right of the icon and go to More tools > extensions or type chrome://extensions in the address bar and verify that the Texthelp Google Admin Tool is listed

Administrator Access
Important!
All Groups and Google admins must be entered in our licensing system as a contact for each license purchased in order to be authenticated as a group admin and to use the tool as outlined below.
Before using the Texthelp Google Admin Tool as a Google Administrator or if designating a Groups admin to use the Texthelp Google Admin Tool, please email support@texthelp.com with the following information
(If this has already been sent, please disregard):
- Each admin’s first and last name
- Each admin’s email address
- Note: This must be the email address used to access the Google Admin Console and must be in a domain that has been registered with the license
- The product code(s) associated with the license that the admin will be managing (very important!!)
How To Designate a Groups Admin
Important!
You must have Google administrator rights in order to designate a Groups Admin.
Method 1:
- In the Google Admin Console under Users, select a user that you want to designate as a Groups Admin
- In their profile, scroll all the way down and click on Show more
- Choose Admin roles and privileges
- Click on Manage Roles
- Select Groups Admin
- Click Update roles
Method 2:
- In the Google Admin Console, go to the Home Page
- Click More Controls at the bottom of the page
- Select Admin roles
- Select Groups Admin from the left column under System Roles
- Select Assign admins and enter a name
- Click Confirm Assignment
- Once you assign a Groups role, you can then select the account and click on the Privileges tab and manage what access they have. We recommend allowing only Read and Update for privileges
Groups admins will need access to the Google Admin Console and then download the Texthelp Google Admin Tool
Note: We recommend creating a test account to make sure that Groups admins can run the tool and not have more access than needed
Options
After accepting the permissions, the options dialog appears. This allows the admin to set the options for the first time. Under the Settings tab the delay between syncs can be set and logging can be enabled.
Settings
Delay
- Delay is how large the wait is between syncs. The default is 0 hours which switches off the sync.
- If Delay is set to 0 then manual syncing must be performed when any changes are made to groups.
- Slide the dot to the right to set the interval for running a sync.
- Once Delay has been set, the Texthelp Google Admin Tool will continue to run in the background and will synchronize users according to the delay set.
Note: Chrome must be running in the background under an admin profile in order for sync to run.
Enable Logging
Enable logging will create a Log tab that captures sync information. This information can be used to send to Texthelp Technical Support in case any errors appear when running a sync.
Groups
Under the Groups tab, the Texthelp Group License Product Code and number of purchased seats appears along with the option to hide the Read&Write for Google Chrome toolbar.
Note: If more than one Product Code is shown, it means that your organization has purchased more than one Group license
Hide Unlicensed
Important!
This option only applies to Read&Write for Google Chrome users.
- Hide Unlicensed controls the hiding of the toolbar to unlicensed users within the domain
- If Hide Unlicensed is ticked, users who are not in the selected group(s) will see a greyed out icon on their Chrome toolbar and will not have access to the Read&Write for Google Chrome toolbar.
Note: Leaving this option unticked will allow non-group users to have access to the free features of Read&Write for Google Chrome. The toolbar will appear as below to unlicensed users:

To change options at a later date, right-click on the Texthelp Google Admin Tool icon on the Chrome toolbar and click Options from the list.
Selecting Groups to License
Multiple groups can be selected for licensing Read&Write (and EquatIO if licensing is purchased) group license users.
- You can select an existing group that is already in the list under the Groups tab
- Create a new group in the Google Admin Console and it will appear in the Groups tab.
- Users then can be added to the new group
- Once all groups are setup, they can be selected in the Groups tab in the Texthelp Google Admin Tool by ticking the box to the right of the group name
Note: All other groups that exist for the domain will also appear in the Groups tab so the list may contain groups that are not being licensed for Read&Write. It is important to note that the Google Admin Console does not allow sorting in the Groups module
Important!
If a license has no Google groups assigned to it the license will not sync. This is to protect licenses that an admin may have access to that they don't administer using the Texthelp Google Admin Tool.
If you wish to remove all users from a license you must assign an empty Google group to the license. For example, if somebody syncs a license with one group attached with 10 users, the license will have 10 users. If they then remove that group and sync it will still have 10 users as the tool sees there are no groups attached and skips that license. If an empty group is attached to the license and synced the users for that license will then drop to 0.
Pre-checks before uploading
Before uploading users, the tool runs several checks. They are as follows:
- Checks that the user is logged in.
- If you aren’t logged in as an administrator or groups admin in the Google Admin Console, the tool cannot proceed any further.
- All admins must be registered in our system in order to use the Admin tool. See Administrator Access for more information.
- Checks that the user has group admin rights.
- You must be logged in with at least a groups admin account to use this tool.
- Checks for Google groups
- All groups will appear in Groups tab - only groups to be used with your Read&Write license should be selected.
- Important! If no groups exist, you will need to create at least one group with users who will be using Read&Write prior to running a sync
- Checks that there are users in the group to license.
- If there aren’t any users in the group, you’ll need to log into the Google Admin Console to add users to the group(s).
- The Texthelp Google Admin Tool will need to run a sync after users have been added
Important!
If there are more users in the group(s) than licenses purchased then only the allotted number of users will actually be licensed. Users will be licensed in alphabetical order as this is how accounts are organized in the Google Admin Console database
Synchronizing
To run a sync, right click on the Texthelp Google Admin Tool icon then choose Sync Now
When synchronization is in progress, a green badge appears on the icon
When synchronization has finished, the green badge disappears. If an error occurs a red badge appears instead.
To view any errors check the status by clicking on the icon which will display the status page
Status Page
Click the icon in the Chrome toolbar to bring up History
History shows Last Successful Sync date and time and Last Error notification