What is the Texthelp Admin Tool?
The Texthelp Admin Tool is a tool that allows customers to manage which of their users get premium access to Texthelp products. If you are a customer that purchased a group license for one of our products, this tool will allow you to license end user emails so that they can sign in and get premium access.
This only licenses emails and does not deploy or install any products.
The Texthelp Admin Tool also has a section where you can license personal emails. If end users are unable to sign in with an organizational email, you have the ability to license a personal email under the Take Home portion of the Texthelp Admin Tool. If you are a customer that purchased an Unlimited license that includes Take Home, you will also have access to this portion of the admin tool. If you are not sure, please reach out to your sales representative.
How to use the Texthelp Admin Tool
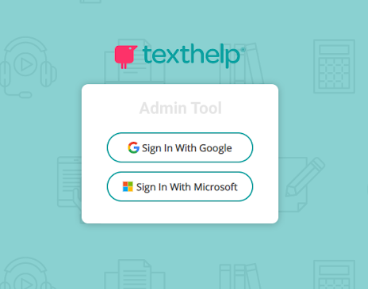
The Texthelp Admin Tool can be accessed from Chrome, Edge, and Safari browsers by going to https://admintool.texthelp.com. If you are blocking cookies for this site, the sign in window will not appear.
You will need a G Suite or Office 365 account to authenticate with. If you are unsure whether you have one of these types of accounts, you will need to ask your IT department.
Once you are signed in, you will see your Group Licenses for any Texthelp products, along with other information:
Product Code
The product code linked to that license
This gets emailed to the sales and tech contacts at your organization
Name
The name of your license
Product
What product is linked to that license
Read&Write

OrbitNote

Equatio

Allowed - The number of seats in your group license
Enrolled - The number of users that have been licensed
Expires - When your license expires
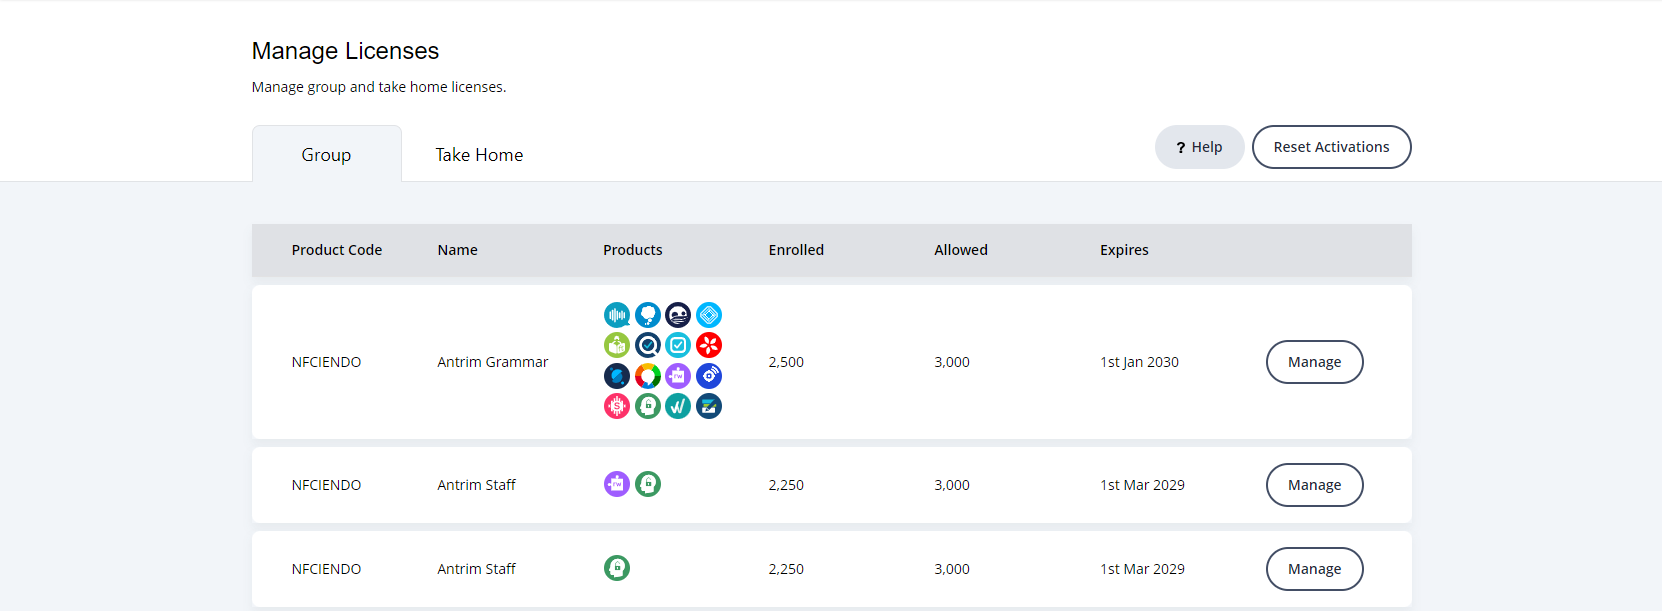
The Manage button will allow you to upload new users
If you are signing in with a G Suite account
There are three ways you can upload users into the Texthelp Admin Tool and license them:
Sync with the Google Admin Console (note: This requires the Super Admin role in G Suite)
On the Home page, click “Manage”
Select “Google Console” in the pop up window
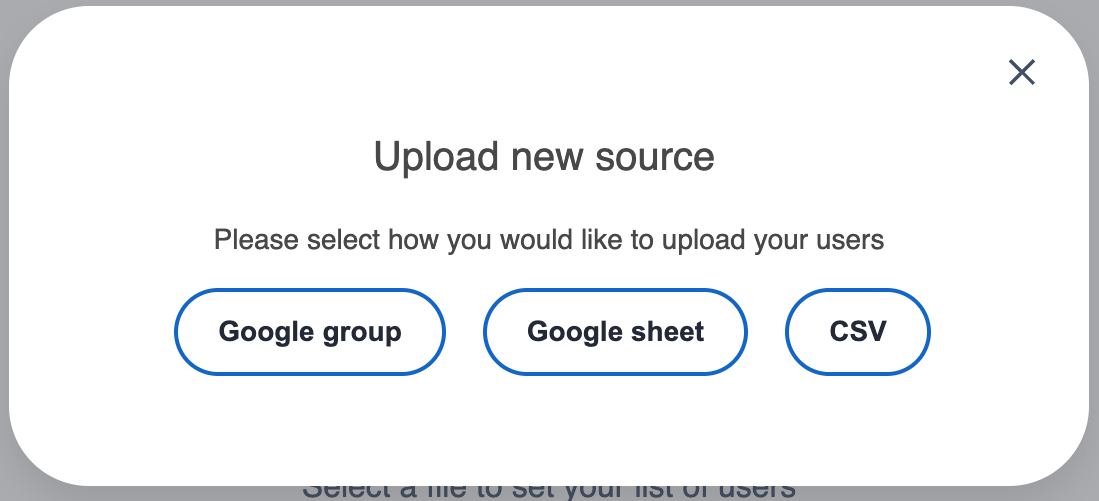
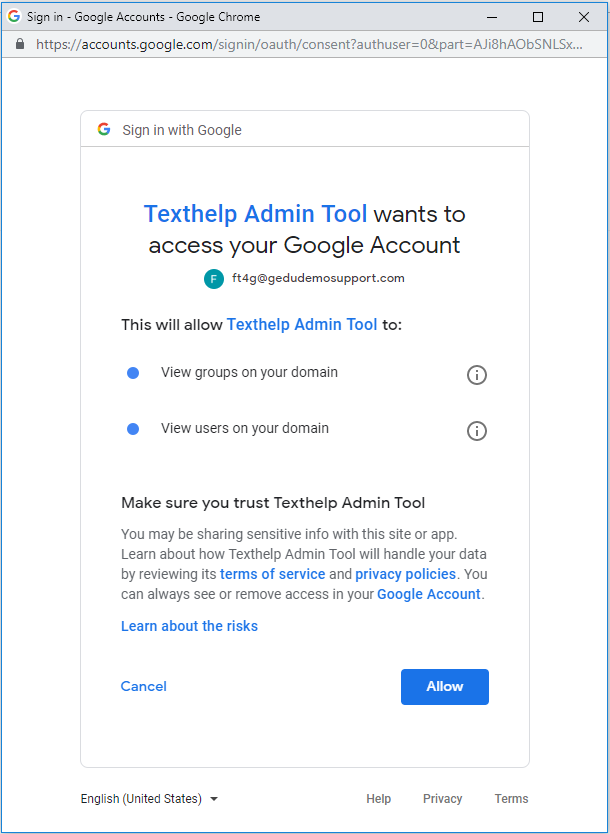
A permission window will pop up and you will need to select “Allow”
If you are not a Super Admin you will get an error message
"Looks like you're not a Google Admin so we couldn't get any group information"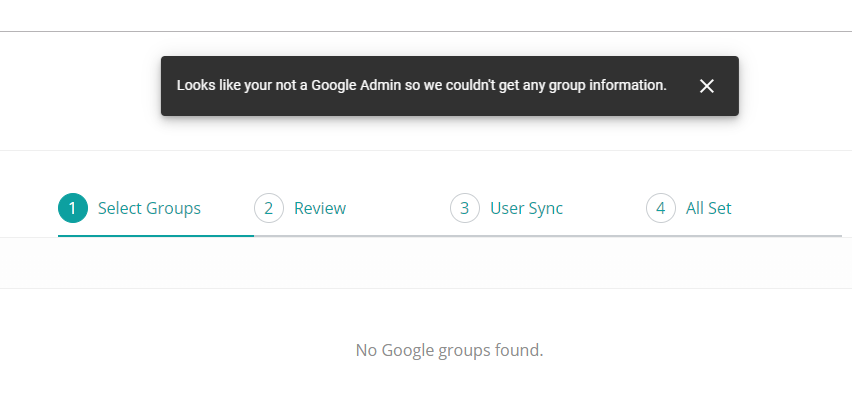
All of your Google Groups will appear on the left-hand side
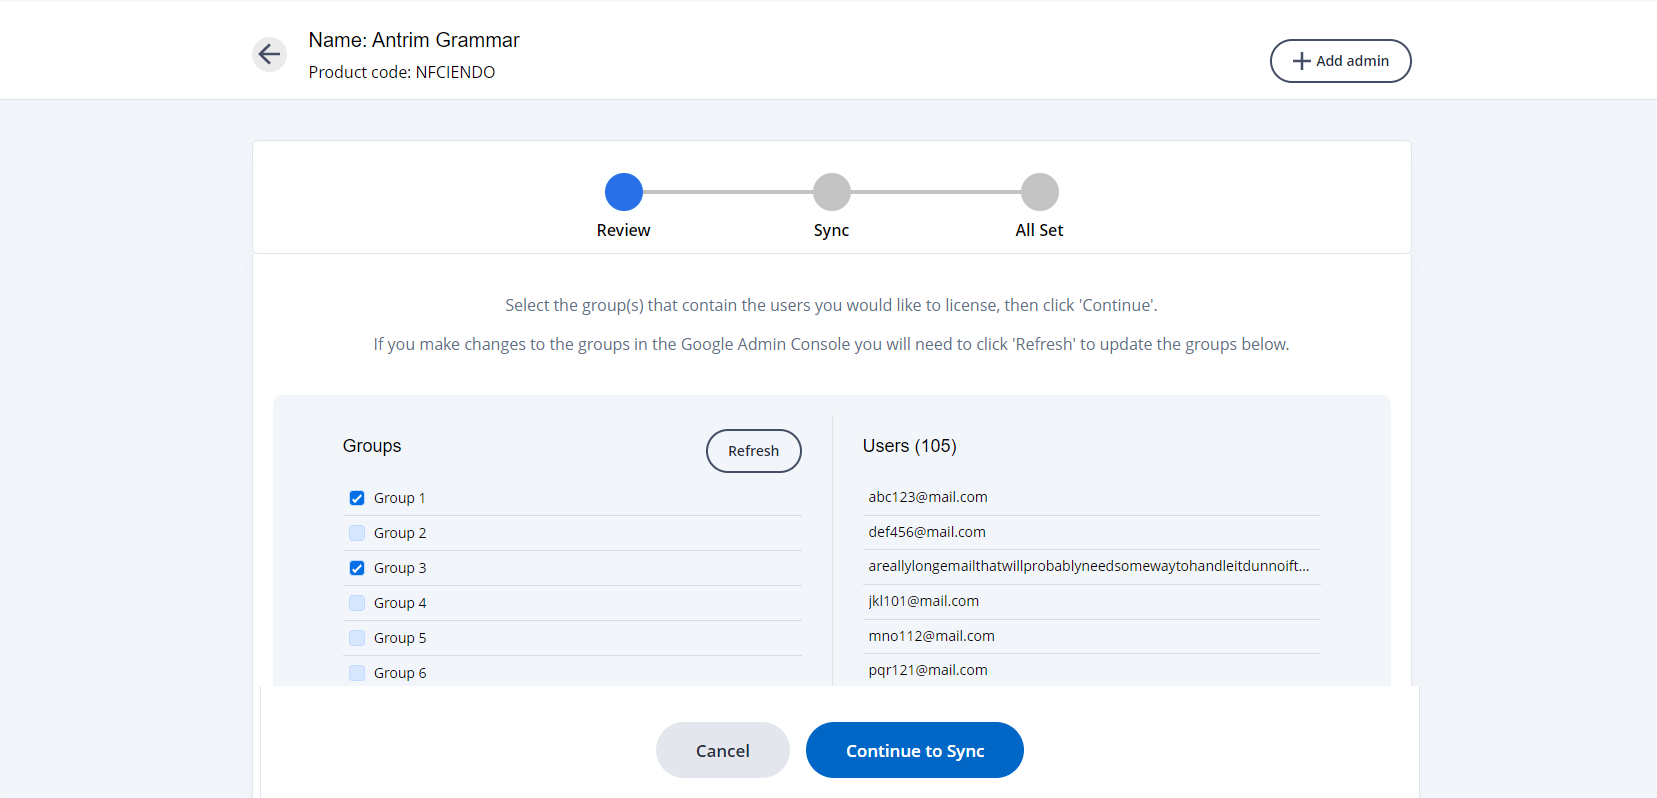
Check all Google Groups you would like to license
Once a group is selected, you will see the list of emails that are in that group
If you do not see an email that should appear, click refresh
If the email still does not appear, log into your Google Admin Console and make sure they are actually part of that group
Select Continue to bring you to a confirmation page
If you enter an email incorrectly or add an email that is not part of your domain, you will receive an error message and can view the details and see why they are invalid
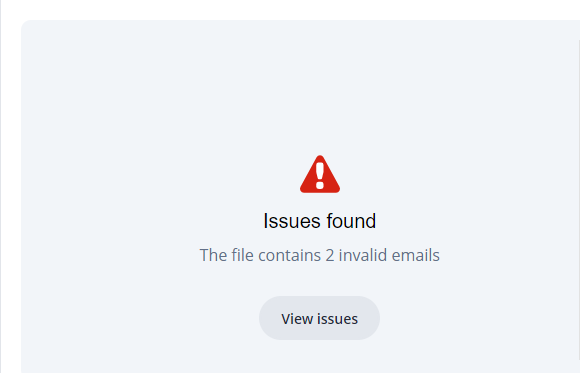
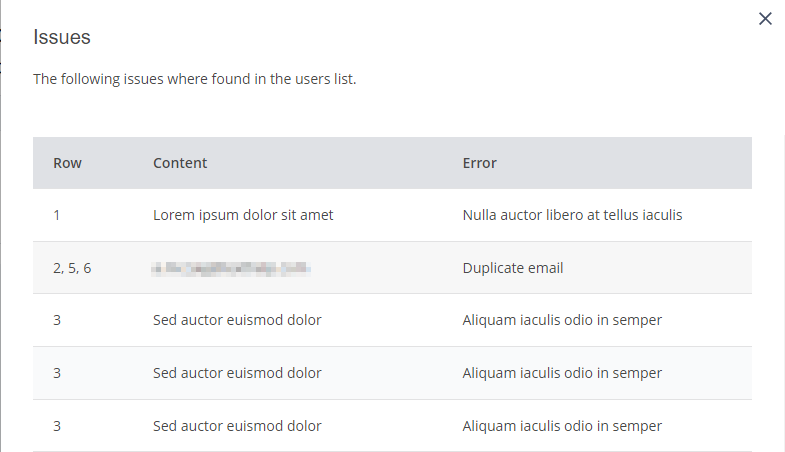
If you exceed the group amount you will get an error message
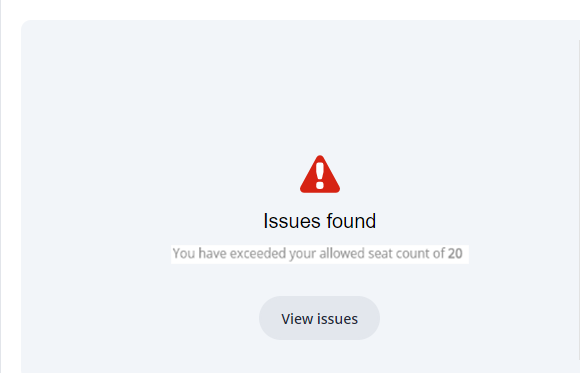
Once the file gets the OKAY you can select Continue and then Sync
If you leave that page before the sync is finished, it will not license all of the users
Large groups will take longer to sync so keep this page open until you see the confirmation page
You will get confirmation that the sync was done correctly
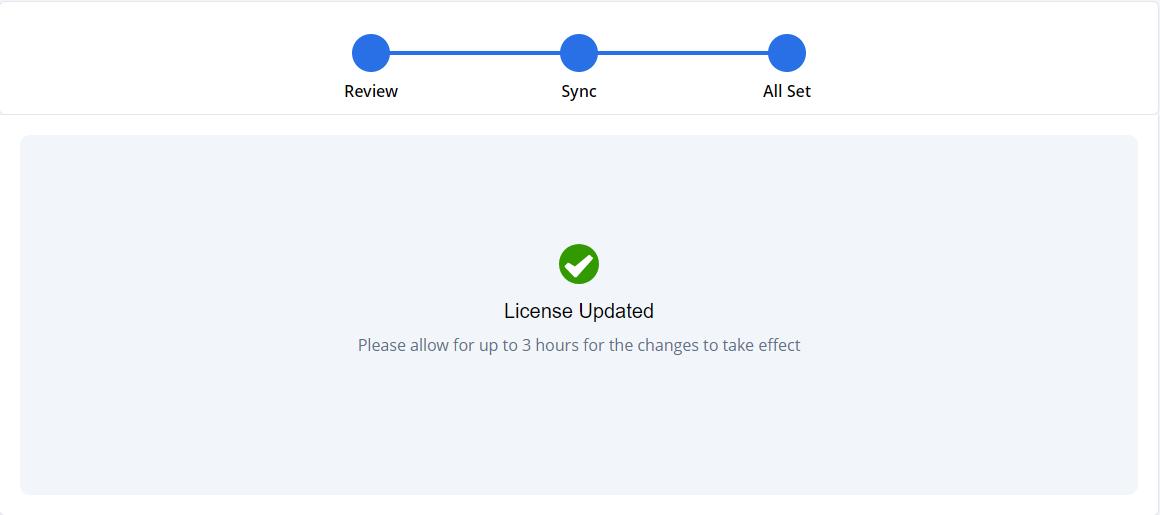
Sync with a Google Sheet
Create a Google Sheet with just the user emails listed in column A. You cannot use multiple sheets.
On the Home page, click on “Manage”
Select “Google Sheet” in the pop up window

Permission window will pop up and you will need to select “Allow”
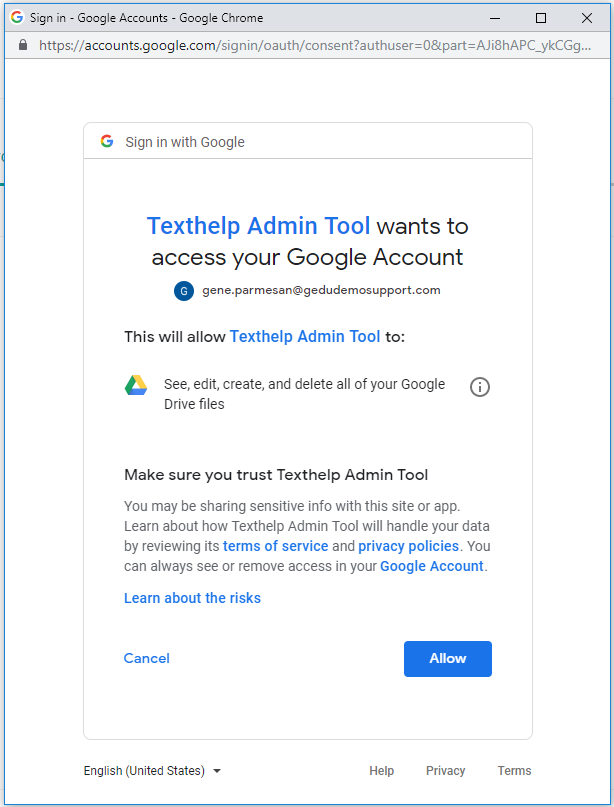
A file picker window will pop up showing you all the Google Sheets in your Drive. Select the Sheet that contains the emails that you would like to license.
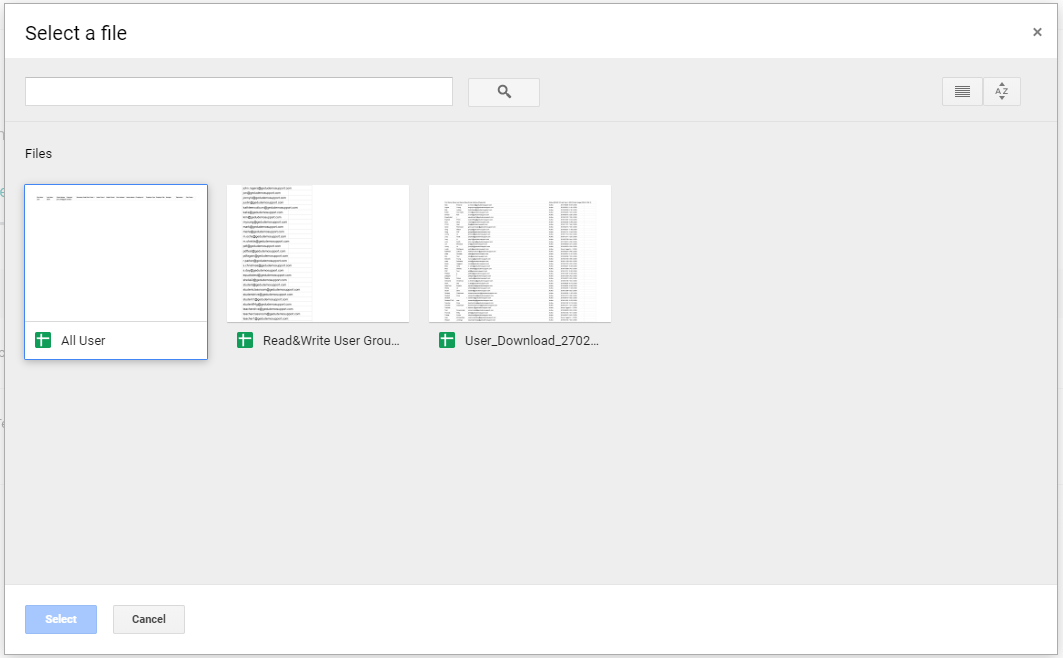
If all the emails match your domain, you can click Continue to sync the users.
If you enter an email incorrectly or add an email that is not part of your domain, you will receive an error message

If you exceed the group amount you will get an error message

Once the file gets the OKAY you can select Continue and then Sync
You will get confirmation that the sync was done correctly

Uploading a CSV
Create a CSV file with just the user emails listed in column A. You cannot use multiple sheets. (Make sure you remember where you save it)
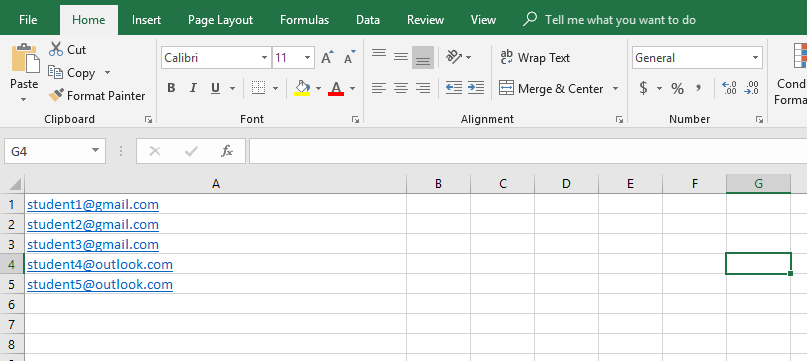
On the Home page, click on “Manage”
Select “CSV” in the pop up window
A window will pop up and you will need to navigate to the CSV file you created
If all the emails match your domain, you can click Continue to sync the users.
If you enter an email incorrectly or add an email that is not part of your domain, you will receive an error message
If you exceed the group amount you will get an error message
Once the file gets the OKAY you can select Continue and then Sync
You will get confirmation that the sync was done correctly
If you are signing in with an Office 365 account
There are two ways you can upload users into the Texthelp Admin Tool and license them
Sync with an Excel Sheet (this will need done manually)
Create an Excel Sheet with just the user emails listed in column A. You cannot use multiple sheets.
On the Home page, click on “Manage”
Select “Excel Sheet” in the pop up window
A file picker window will pop up showing you all the Excel Sheets in your OneDrive. Select the Sheet that contains the emails that you would like to license. You can also upload a file from your computer.
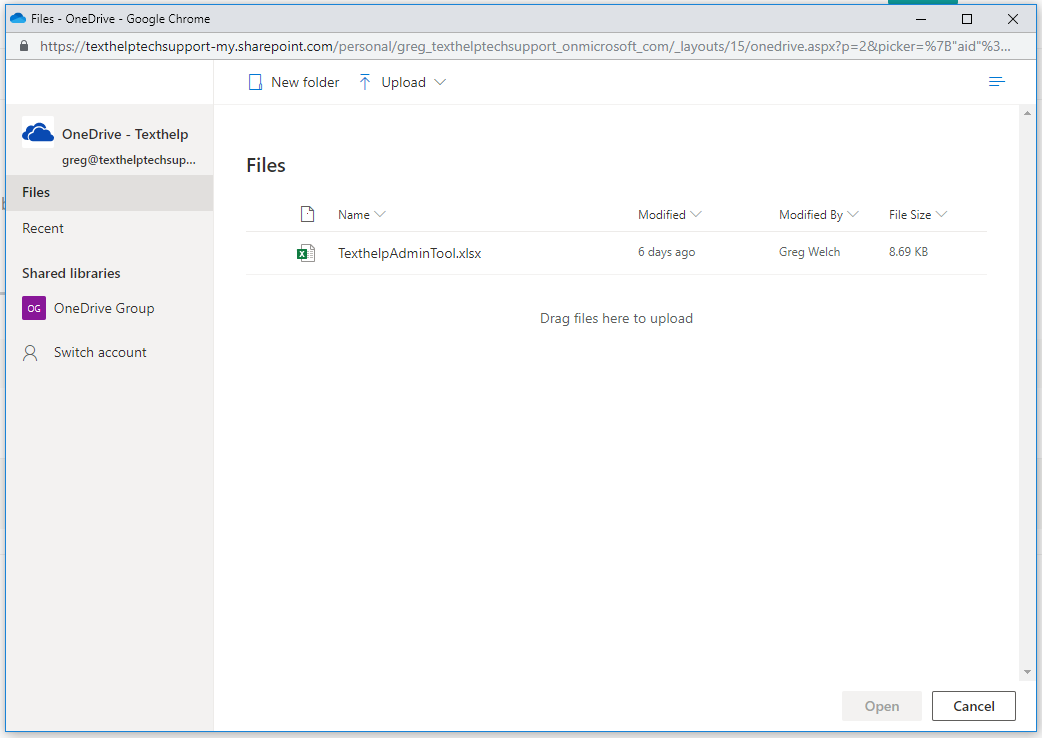
If all the emails match your domain, you can click Continue to sync the users.
If you enter an email incorrectly or add an email that is not part of your domain, you will receive an error message

If you exceed the group amount you will get an error message

Once the file gets the OKAY you can select Continue and then Sync
You will get confirmation that the sync was done correctly

Uploading a CSV
Create a CSV file with just the user emails listed in column A. You cannot use multiple sheets. (Make sure you remember where you save it)
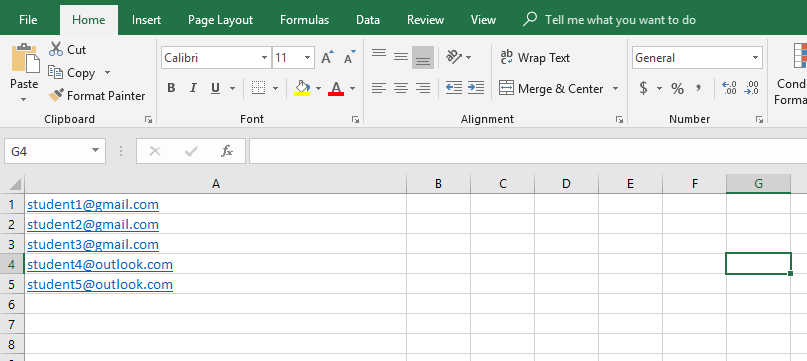
On the Home page, click on “Manage”
Select “CSV” in the pop up window
A window will pop up and you will need to navigate to the CSV file you created
If all the emails match your domain, you can click Continue to sync the users.
If you enter an email incorrectly or add an email that is not part of your domain, you will receive an error message
If you exceed the group amount you will get an error message
Once the file gets the OKAY you can select Continue and then Sync
You will get confirmation that the sync was done correctly
Switching file source
If you would like to choose a different source for your list of users, follow the steps below depending on which file type you’re using.
For users synced with the Google Admin Console
Click on “Manage” in the Home screen
Click “Continue”
Click on “Change Source”
Select the new source
For users synced with a Google Sheet
Click on “Manage” in the Home screen
Select “Change Source”
Select the new source
For users synced with a CSV
Click on “Manage” in the Home screen
Select the new source
Authorizing access to the admin tool for other users
You can authorize other admins, teachers, etc. from your organization to access the Texthelp Admin Tool and manage your users. You will need to be set up as our Tech or Sales Contact for your license.
Click 'Manage' on the Product Code you would like this user to administrate
Click on “Add Admin” in the top right corner of the page. If you do not see “Add Admin” please email support@texthelp.com
Enter in the email they will use to sign into the Admin Tool with. *It is important to enter the email correctly, any typos will not allow the user to sign in*
Enter in the first and last name
Licensing users with the Take Home section of the Admin Tool
The Take Home tab in the Texthelp Admin Tool is used for licensing personal emails if your organization does not use G Suite or Office 365, or if students prefer to use Read&Write with a personal email address. There are two ways to use the Take Home tab.
Uploading personal emails
When signed into the Texthelp Admin Tool with a Gmail
- Sync with a Google Sheet
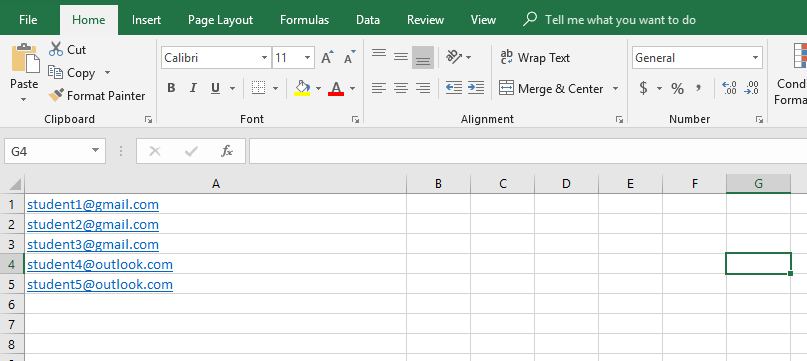
Create a Google Sheet with just the user emails listed in column A. You cannot use multiple sheets.
On the Home page, click on “Manage”
Select “Google Sheet” in the pop up window

Permission window will pop up and you will need to select “Allow”
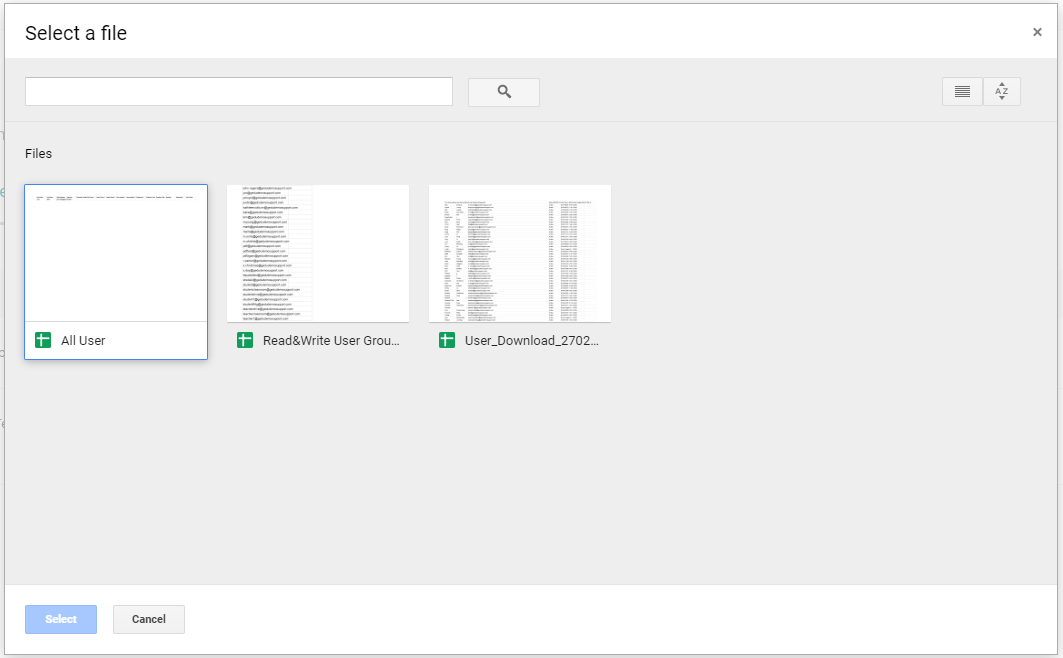
A file picker window will pop up showing you all the Google Sheets in your Drive. Select the Sheet that contains the emails that you would like to license.
If you exceed the group amount you will get an error message

Once the file gets the OKAY you can select Continue and then Sync
You will get confirmation that the sync was done correctly

- Uploading a CSV
Create a CSV file with just the user emails listed in column A. You cannot use multiple sheets. (Make sure you remember where you save it)
On the Home page, click on “Manage”
Select “CSV” in the pop up window
A window will pop up and you will need to navigate to the CSV file you created
If you exceed the group amount you will get an error message
Once the file gets the OKAY you can select Continue and then Sync
You will get confirmation that the sync was done correctly
- Sync with a Google Sheet
When signed into the Texthelp Admin Tool with a Microsoft email
- Sync with an Excel Sheet
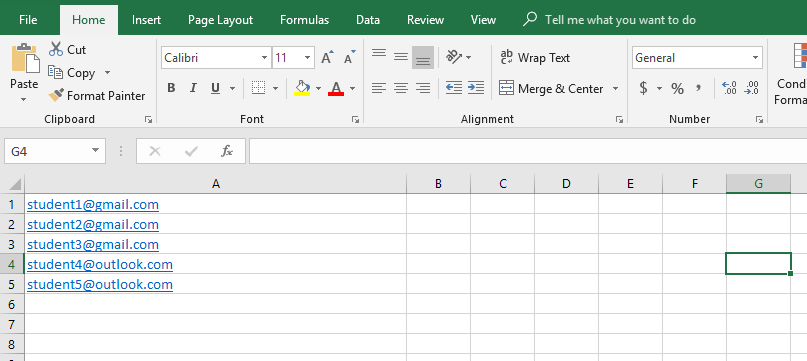
Create an Excel Sheet with just the user emails listed in column A. You cannot use multiple sheets.
On the Home page, click on “Manage”
Select “Excel Sheet” in the pop up window
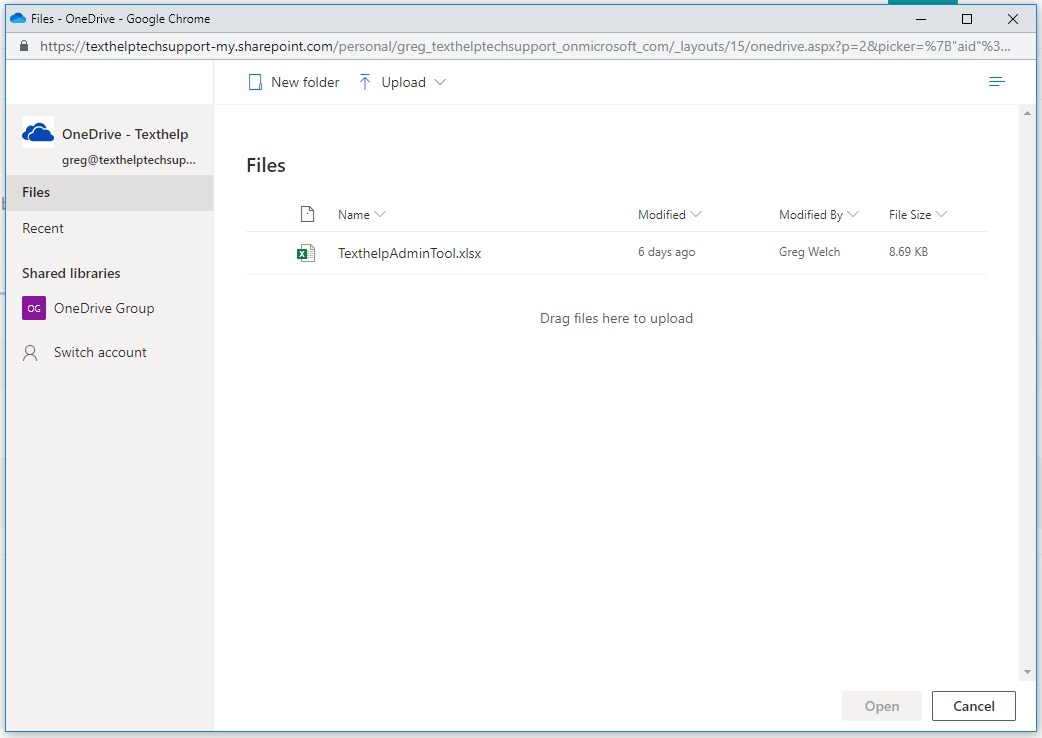
A file picker window will pop up showing you all the Excel Sheets in your OneDrive. Select the Sheet that contains the emails that you would like to license. You can also upload a file from your computer.
If you exceed the group amount you will get an error message

Once the file gets the OKAY you can select Continue and then Sync
You will get confirmation that the sync was done correctly

- Uploading a CSV
Create a CSV file with just the user emails listed in column A. You cannot use multiple sheets. (Make sure you remember where you save it)
On the Home page, click on “Manage”
Select “CSV” in the pop up window
A window will pop up and you will need to navigate to the CSV file you created
If you exceed the group amount you will get an error message
Once the file gets the OKAY you can select Continue and then Sync
You will get confirmation that the sync was done correctly
- Sync with an Excel Sheet
Using the Take Home Code
The Take Home Code allows end users to sign into Read&Write if they don’t have an email address or can’t sign in with one of the suggested email providers
This is currently only available for signing into Read&Write for Windows
*DO NOT distribute this code outside of your organization*When signed into the Admin Tool, click on the Take Home tab.
Under Code, you can click on Show to reveal your Take Home Code.

This code can be used to sign into Read&Write for Windows
In Read&Write's sign in window, click on Show More.
Click on Use Take Home Code
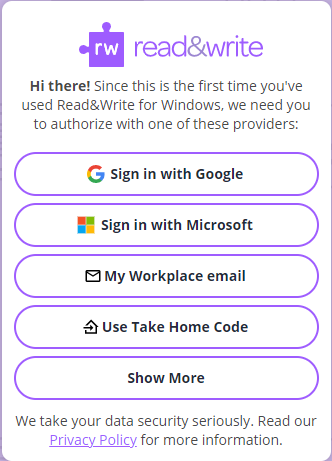
Enter in the code that was revealed in the Admin Tool
Changing the Take Home Code
Admins can change the Take Home Code by clicking Take Home in the Texthelp Admin Tool and then clicking Manage

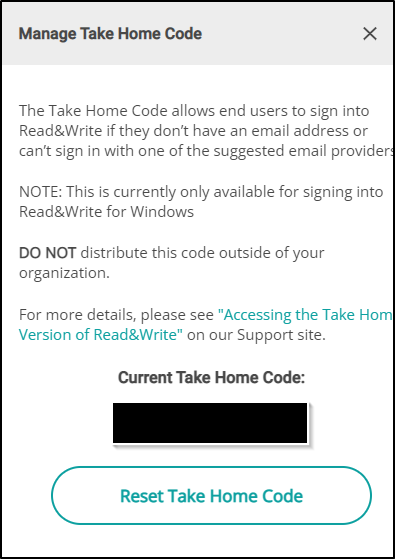
Click Reset Take Home Code to expire the existing code and generate a new code
Frequently Asked Questions
I am signed into the Admin Tool but I do not see my licenses
You will need to reach out to your Admin and ask them to add you to the license.
Will the license update automatically when changes are made to the license group?
No. Each time a user is added or removed from your license group, an Admin must return to the Texthelp Admin Tool and re-sync.
Can I use one file (Excel or Google Sheets) that has multiple sheets within that file?
No you cannot. It needs to be one sheet with just emails in column A.
I am the Admin and when I signin I do not see my license
You will need to contact support@texthelp.com
