Please note:- If your organization uses G Suite or Microsoft, the Deployment Option 1 - Users sign in to Read&Write with Google or Office 365 can be used to install Read&Write.
IMPORTANT:
|
Download the Multi-User Setup tool and run the Read&Write Multi User Setup.exe. This will install the application to your computer and when finished, you’ll find a shortcut to the application on your Desktop.
Run the Read&Write Multi-User Setup.exe and the Welcome screen will appear.
3. Click the Get Started button
4. Select Network of computers
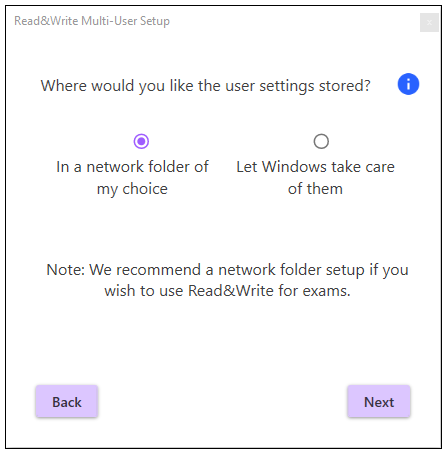
5. Decide where you want your users’ settings to be stored and click Next

In a network folder of my choice - this will allow you to specify a folder on your network. This folder must be writable and accessible to all users and admins when using Read&Write. (Please note: This is required for exams.)
Let Windows take care of them - this will default to storing user settings in the user’s roaming profile.
6. If you selected In a network folder of my choice, type in the UNC path or browse to the location of that folder and then click Next
An Admin and a Users folder will be created in the location you entered. All your users should have full permissions to the Users folder and Read/Write permissions to the Admin folder.
7. Enter your Product Code. This can be found in your onboarding email received upon purchasing Read&Write.
8. Choose where you would like to save the MSI that will be created. This will default to your desktop.
9. Click Create
10. Deploy this MSI along with the Read&Write software across your network using your preferred deployment methods. When your end users launch Read&Write, they will not be prompted to log into the program.
How to set up Read&Write on a single computer
Click the Get Started button on the Welcome screen
Select Only this computer
3. Click Next then enter a Product Code.
4. Select Create
Please Note:-
Extensions are needed to allow Read&Write to interact with your browser. Information on these extensions can be found in the Using Read&Write for Windows with Google Chrome and Using Read&Write for Windows with Microsoft Edge articles.