How to fix the problems with speech in ClaroRead.
Symptoms
“It’s not reading anything any more!”
“I press Play and everything flashes really quickly in Word but no speech”
“I’ve installed a new piece of software and now ClaroRead/WordRead will not work”
"Some of the voices work, and some don't!"
"My Vocalizer voice is expired"
Diagnosis
Make sure you can hear non-speech sound – go to YouTube or something and play something. If you can’t get your computer to make any sound, then you have to fix your sound first.
Download and run SAPI5Test.exe – see if any of the available voices work.
Open Control Panel > "Change text-to-speech settings". If the "Speech Properties" window does not appear, try Cure Number 2 first.
If "Speech Properties" does appear, switch to one of the Microsoft voices (for example, Zira, Anna, or Hazel). Click the Preview button. If no sound is produced, or an error message results, try Cure Number 3 first.
32-bit Windows machines only: If a Microsoft voice works, but some or all of the Claro voices (e.g. ScanSoft Daniel_Full_22kHz or Vocalizer Daniel) do not speak, then go to Cure Number 4.
64-bit Windows machines: our Claro voices will not show up in the Speech dialog in Control Panel. However you can launch the 32-bit Control Panel window by downloading and running our Speech Control Panel program. Go straight to Cure Number 4.
Uninstalling and Re-installing the voice installer, go to Cure Number 5.
Cure 1: Reinstall SAPI5
SAPI5 is the built-in Microsoft Windows speech system. But if it gets broken, you may be able to fix it by installing the Microsoft-provided SAPI5 installer.
You do this by installing SAPI5.MSI from the download from the Claro Software support website.
If that does not work, proceed to Cure Number 2:
Cure 2: Re-register sapi.dll
Use one of the following sets of instructions to re-register sapi.dll manually:
Option 2.1: not using the command line (using the mouse)
Open Windows Explorer and navigate to “C:\Windows\SysWOW64\Speech\Common”.
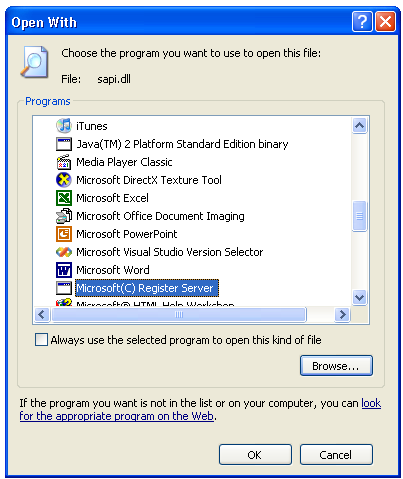
Right-click on sapi.dll, and select Open With from the drop-down menu, then select “Choose Program…” from the second menu.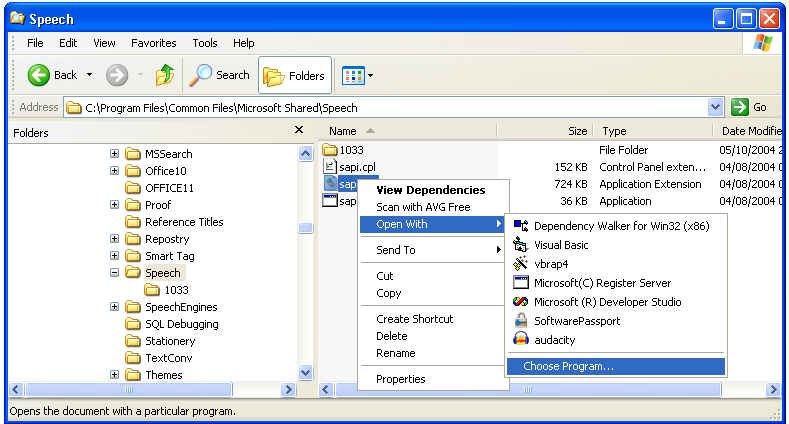
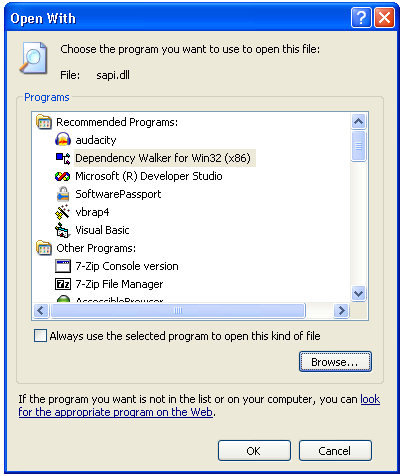
This will open the Open With dialog. Click the Browse button.
Navigate to “C:\Windows\SysWOW64\regsvr32.exe”.
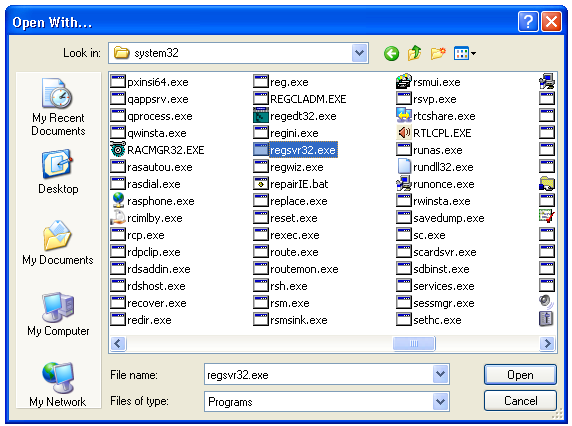
Click OK and you should see “Microsoft (C) Register Server” as the selected program. Click OK.
You should see this message (or something very similar): “DLLRegisterServer in C:\Windows\SysWOW64\Speech\Common\sapi.dll succeeded.”

Option 2.2: using the command-line
Click on the Start button and type “command”. This will bring up “Command prompt” as one of the Programs you can run.
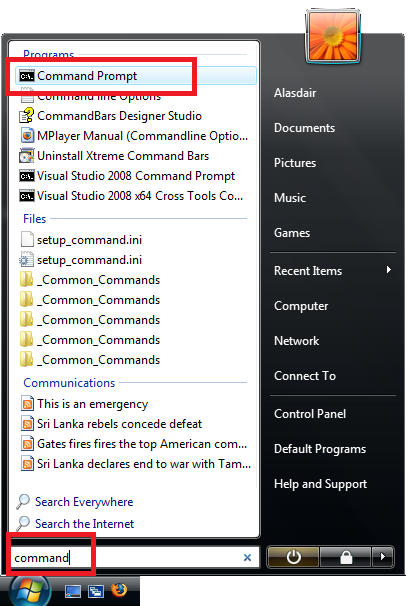
Right-click with the mouse on “Command prompt” to bring up the context menu. Select (left-click) the option “Run as Administrator”.
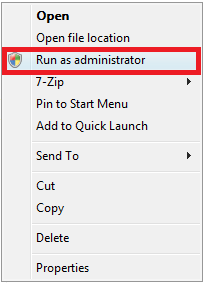
You may have to OK a User Access Control (UAC) prompt. Confirm that you want to run ‘Command prompt’ as an administrator.
You must now type a sequence of commands followed by the return key.
First, if you are on a 64-bit machine, enter this line, pressing return at the end:
cd syswow64Next, enter these lines, pressing return at the end of each:
cd speech
cd common
regsvr32 sapi.dll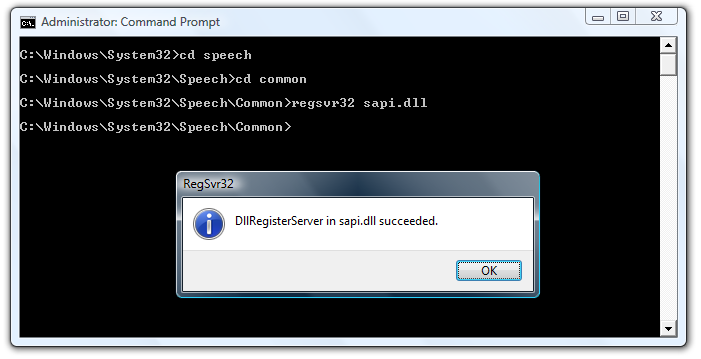
You should see the message “DllRegisterServer in sapi.dll succeeded”, or something very similar. That’s it, you can now close the ‘Command prompt’ window.
Cure 3: Delete User Lexicons
This is an old problem in Windows, and was described in Microsoft support article 838659.
Click on Start.
Type %appdata% and press Return.
Windows Explorer should now open in a folder called “Application Data”. Navigate by double-clicking on folders to “Application Data\Microsoft\Speech\Files\UserLexicons”. This will contain one or more files with very long filenames.
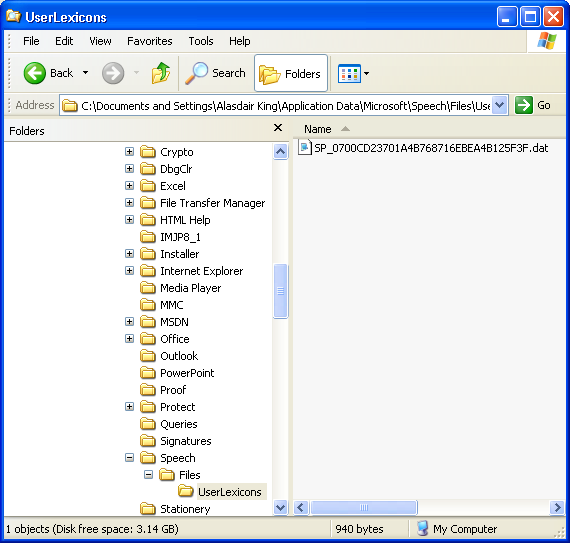
Delete all the files in this UserLexicons folder. They will be recreated next time speech is used.
Close Windows Explorer and restart your Claro Software program.
Cure 4: Repair Vocalizer Expressive voices
If you find that some or all of your Vocalizer Expressive voices have stopped working then it is likely that a recent installation has broken the voice system. This is most easily fixed by uninstalling and reinstalling the Claro voices: you can safely install Claro voices after any other vendor’s voices, because our voices recognise where existing voices are installed and make sure they install there.
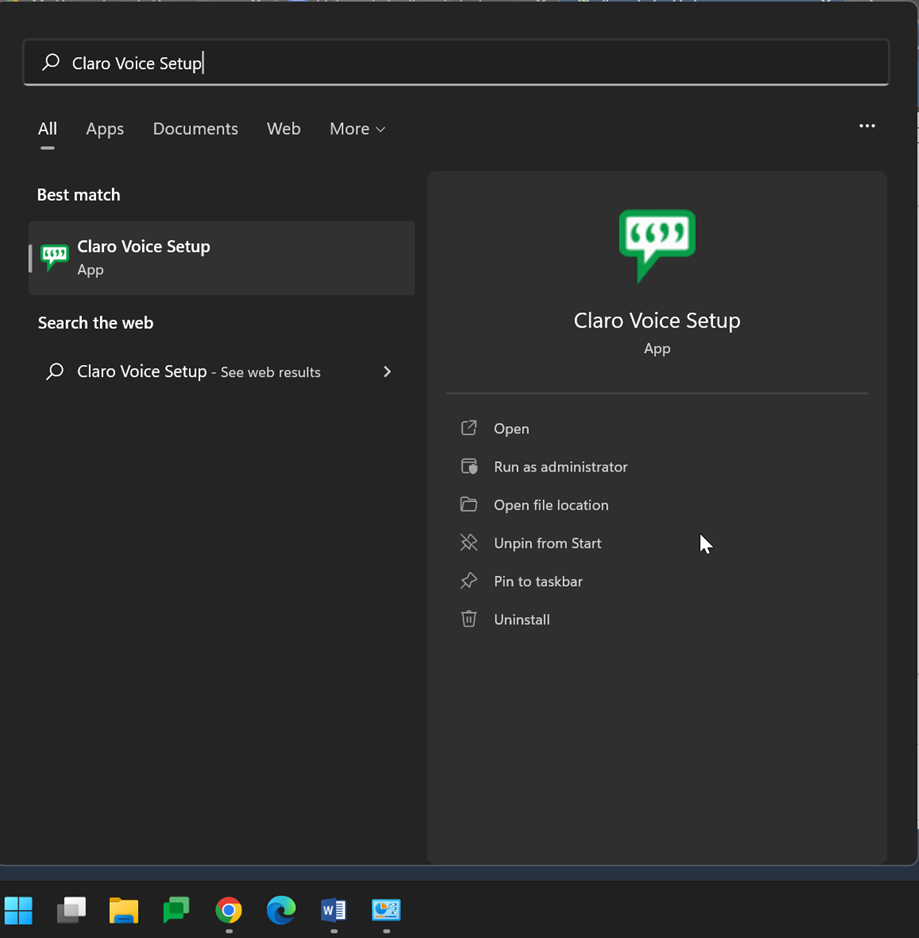
You can install the voices again from Claro Voice Setup, this can be found by going to Windows/Start menu and typing Claro Voice Setup.
64-bit Windows Issues
All our text-to-speech voices are 32 bit packages and will work with the Claro software with which they are sold on both 32 and 64 bit systems: however, on a 64 bit system the voice may not work in third party programs and will not be shown in the Windows Speech Control Panel or in the Narrator voice selection panel.
In order to display the 32 bit Windows Speech Properties Control Panel on a 64 bit version of Windows:
- Click Start
- Enter C:\\Windows\SysWOW64\Speech\SpeechUX\sapi.cpl into the search box and press Enter.
Other things to try
First check that sound is working: either go to YouTube or similar and press Play or try opening a .wav file in the Media folder in your Windows folder.
It’s always worth trying to run the Microsoft SAPI5 installer, SAPI5.MSI which will fix many problems. Download SAPI5.MSI.
If you have Acapela voices that are appearing in ClaroRead but not speaking this should make them speak correctly.
If you can’t get speech to work (none of the voices, from Claro Software or Microsoft, say anything) and you receive an error message when opening the Speech Properties window (for example “The requested task cannot be carried out because the necessary speech engine could not be created. Please select a different engine and/or a different audio device.”) then you can try Microsoft Fix 838659.
If you select a voice in the Speech Properties window in Control Panel and get the message "This voice cannot be played. Please try selecting another voice or selecting a different audio output device" then the voice may have been uninstalled, even though it still appears in the Speech list, or the Vocalizer voices on your machine may have been broken by another voice installer. Try uninstalling and reinstalling the affected voices: you can install these from Claro Voice Setup in the Windows/Start menu.
Another thing to check: open Control Panel and the Speech Applet. Hit the Audio Output button. Make sure the first option “Use preferred audio device” is selected:
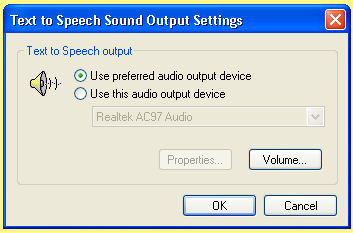
If you try to open the Speech Control Panel Applet and select the Text To Speech tab and get the message “An exception occurred while trying to run “C:\WINDOWS\system32\shell32.dll,Control_runDll “C:\Program Files\Common Files\Microsoft Shared\Speech\sapi.dpl”,Speech” (it has a title of “RUNDLL”) then the current system voice is broken. This can happen when incompatible voice installers clash with each other. Because the current system voice is not valid you cannot open the Speech applet, so you cannot change the current system voice. You have three options:
Re-run the voice installer for the broken current system voice. This should let you open the Speech applet. Change the system voice to Microsoft Sam. Then uninstall the voices you do not need to use, then reinstall the voices you do need to use.
Download and run SAPI5 Voice Remover, select the non-functioning voice from the list, and delete it from the machine. This removes the voice from Window’s list of available voices, and the Speech applet when next run notices it isn’t there and switches to another voice. The broken voice is not installed – it is still on your hard disk – but it will not work anywhere.
(For the technical) You can change the default SAPI5 voice manually to Microsoft Sam (or any other working voice) by opening regedit, navigating to the registry key HKEY_CURRENT_USER\Software\Microsoft\Speech\Voices and changing the value of DefaultTokenId to “HKEY_LOCAL_MACHINE\SOFTWARE\Microsoft\Speech\Voices\Tokens\MSSam” (no quotation marks).
If User Access Control is disabled, re-enable the security feature and try again.
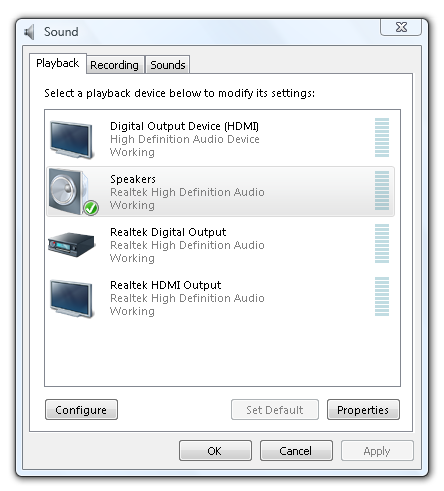
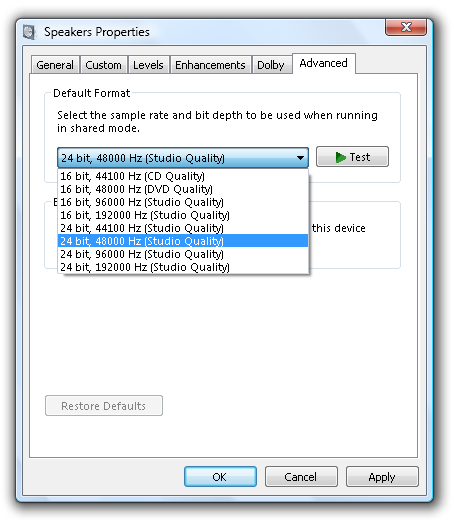
Speech will stop working if the output sounds for your speaks are set to any value greater than 48,000Hz. Open Control Panel, Sounds dialog, Playback tab, select your speakers and click the Properties button. Go to the Advanced tab and ensure the Default Format drop-down is set to a maximum of 48000Hz.
SAPI5 entries are all found in the registry key HKLM\Software\Microsoft\Speech or HKLM\Software\WOW6432Node\Microsoft\Speech for 64-bit machines. Entries in this key, especially from voices that you have uninstalled or are found in TokenEnums keys, can cause speech to not work and the Speech control panel to not run. Try deleting non-Microsoft entries, but do not touch MMAudioIn, MMAudioOut, or anything mentioning Microsoft, Hazel, or Zira. Back up the SAPI5 registry key first so you can restore it if necessary.
You may find that the RealSpeak Russian Katerina voice speaks very slowly. Increase the voice speaking rate by selecting the Settings button and changing the slider to the maximum value (10). This will speak at a normal speed: higher rates are not possible with this voice.
Do contact Claro Technical Support for more help:
- Email support@clarosoftware.com
UK call +44 (0)1772 977 888
Cure 5: Vocalizer Voice has expired
We provide Vocalizer voices in demo mode that stop working after a few weeks.

When the vocalizer voice shows as expired, you will need to uninstall and reinstall the voice.
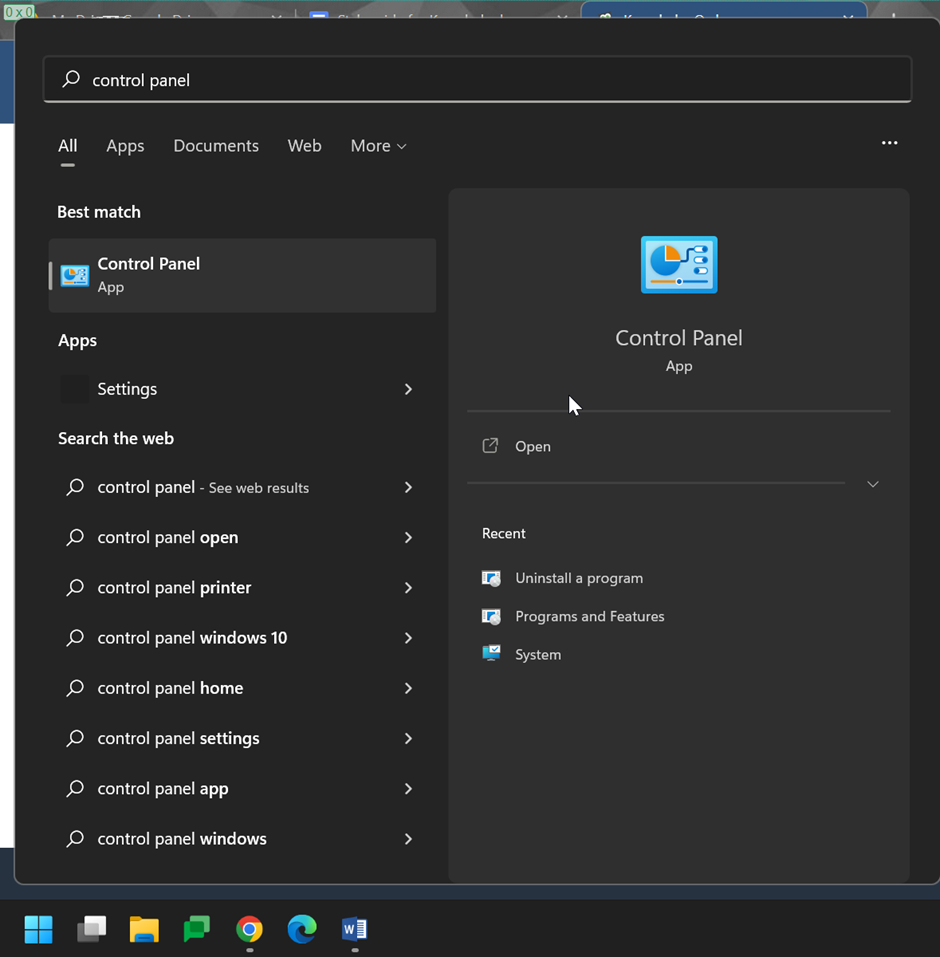
You will uninstall by going to the Windows/Start menu and finding Control Panel.
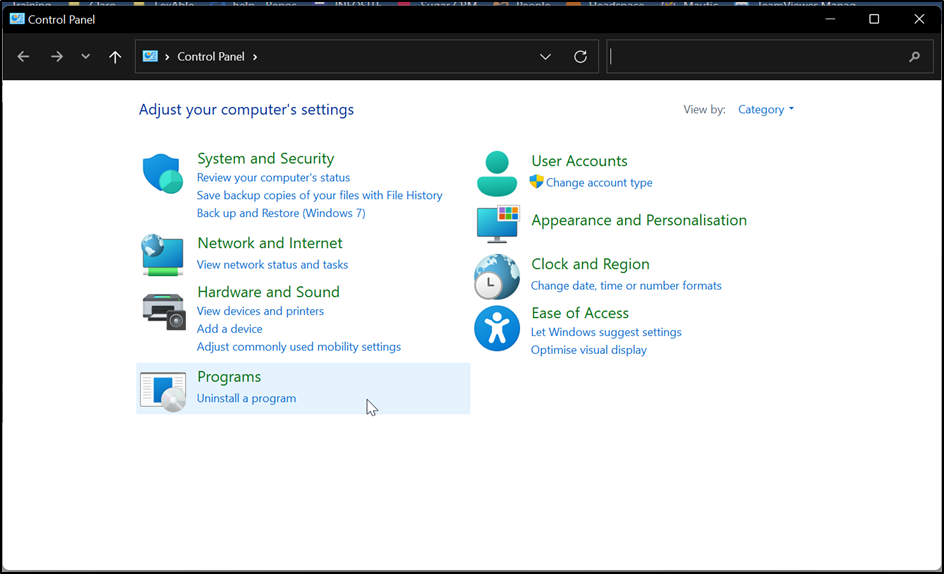
You will open Control Panel and find "Uninstall a Program" or "Add/Remove Programs"
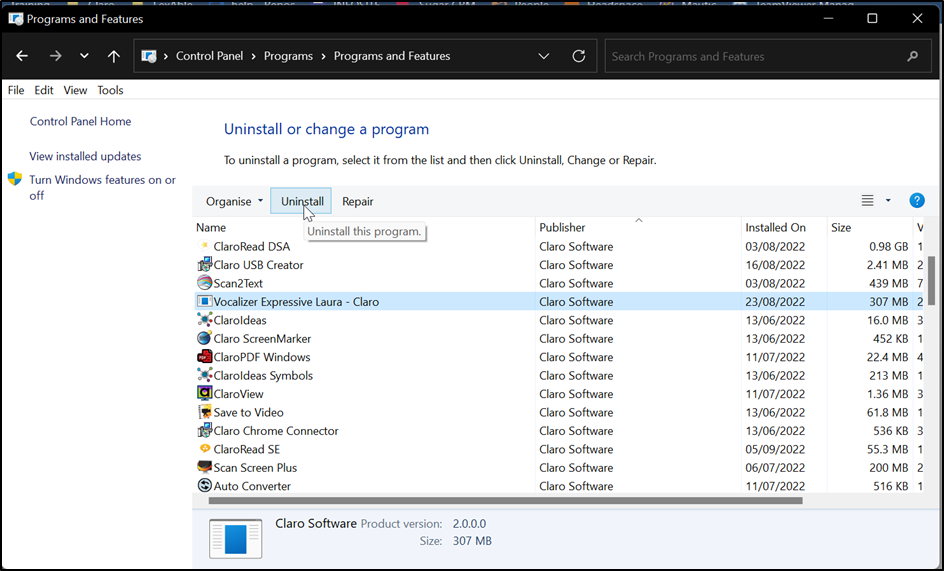
You will then click the voice you are using, then go to Uninstall.
Once the voice is uninstalled, if you go to the Windows menu and search for Claro Voice Setup then click on it.
With the Voice setup open, you can click on the voice you want and then install.

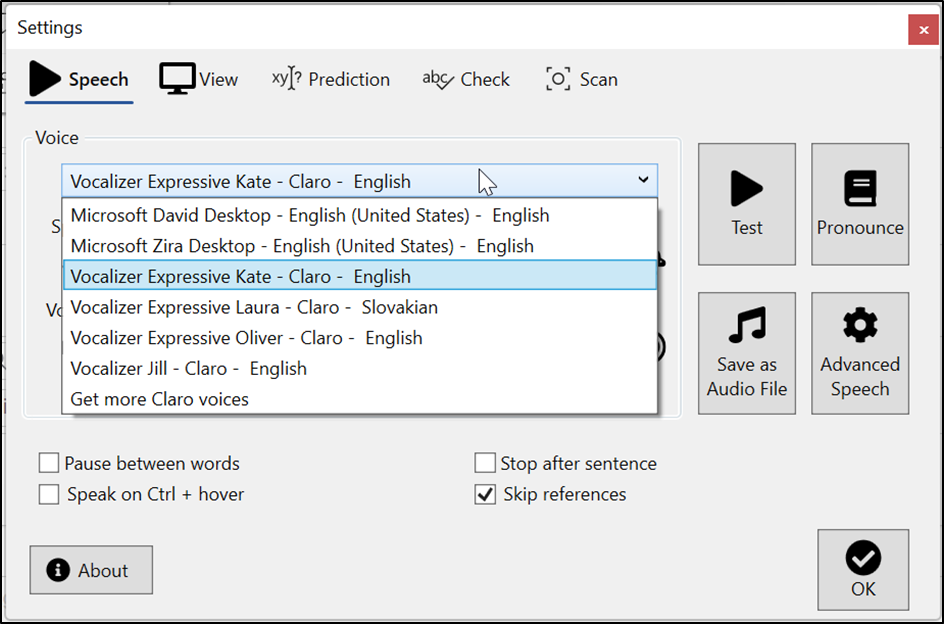
Once the voice is installed, you can open ClaroRead>Settings and the drop down Voice menu and choose your newly installed voice.
