Some of our Apps are free to install but you need to unlock all their premium features. If you have a site licence that gives you this right then this page will explain how to do this across all your iOS devices.
Looking for how to unlock our iOS Apps with your individual copy of ClaroRead? Go to Unlocking iPad and iPhone Apps with ClaroRead.
You will need the correct licence key in your Claro Cloud account. Then you can login in our iOS apps and activate or unlock the app. You can login by tapping the login button and entering your Claro Cloud username and password. Alternatively, if you are using a licensed domain, you can also use this to log in and unlock our apps.
First you have to set up your Claro Cloud account:
Now you can automate the login procedure, which is useful for organisations that distribute their apps using Mobile Device Management (MDM) systems. This is simple to configure and all that is required, is to configure a settings file and push that out to all devices. All your users will have the fully-unlocked Apps.
This guide assumes you are already with familiar with setting up an MDM and distributing apps.
Configuring the settings file
The settings file that our iOS apps look for, are standard .plist files, which are basically XML files. To configure your settings file, create a template plist file. You can create an empty text file and then copy and paste this code into it:
<?xml version=”1.0″ encoding=”UTF-8″?>
<!DOCTYPE plist PUBLIC “-//Apple//DTD PLIST 1.0//EN” “http://www.apple.com/DTDs/PropertyList-1.0.dtd”>
<plist version=”1.0″>
<dict>
<key>username</key>
<string>USERNAME_HERE</string>
<key>password</key>
<string>PASSWORD_HERE</string>
<key>examMode</key>
<string>0</string>
</dict>
</plist>
You can save this file with the .plist extension and use it as a template file.
To configure the settings file, simple replace “USERNAME_HERE” with your ClaroRead Cloud username and replace “PASSWORD_HERE” with your ClaroRead Cloud password.
If you want to log in using your domain instead, then use this template instead:
<?xml version=”1.0″ encoding=”UTF-8″?>
<!DOCTYPE plist PUBLIC “-//Apple//DTD PLIST 1.0//EN” “http://www.apple.com/DTDs/PropertyList-1.0.dtd”>
<plist version=”1.0″>
<dict>
<key>domain</key>
<string>DOMAIN_HERE</string>
<key>examMode</key>
<string>0</string>
</dict>
</plist>
And replace “DOMAIN_HERE” with your licensed domain.
You can enable exam mode in the Claro Keyboard app by including a key-value pair for “examMode” and setting its value to 1:
<key>examMode</key>
<string>1</string>
Set the string value to 0 to disable exam mode.
Exam mode is a feature of the Claro Keyboard app that disables word prediction and dictionary lookup features, making the Keyboard app compliant with standard examination regulations.
Distributing the settings file as a custom payload in a configuration file
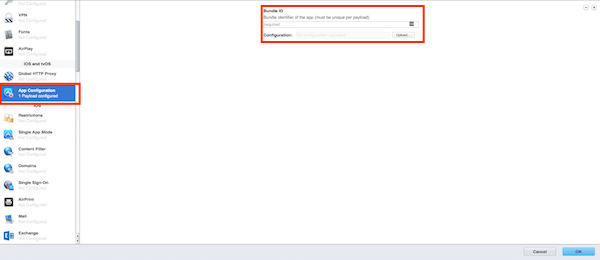
Depending on which MDM you are using, the UI might be slightly different, but settings files are generally distributed uniformly using the “App Configuration” setting of the configurable settings. This uses a custom payload that includes the settings .plist file you created earlier with your username and password in. This is the App Configuration section for Apple’s Profile Manager MDM:

App Configuration
You’ll want to enter the bundle ID of the app you are configuring. The bundle IDs for our apps are:
Claro ScanPen Premium
clarosoftware.ClaroPenFree.engb
ClaroPDF
clarosoftware.ClaroPDFLite.engb
ClaroSpeak
clarosoftware.ClaroSpeak-Lite
Once you’ve entered the correct bundle ID, you’ll want to upload the settings .plist file you created earlier, by selecting it in the configuration upload option. If you’re able to configure the location or reference of the settings .plist file inside the app, the standard reference is to use the key:
com.apple.configuration.managed and store the file in NSUserDefaults.
Save the App Configuration and push your new settings to your desired devices.
Distributing the settings file via the apps Documents directory
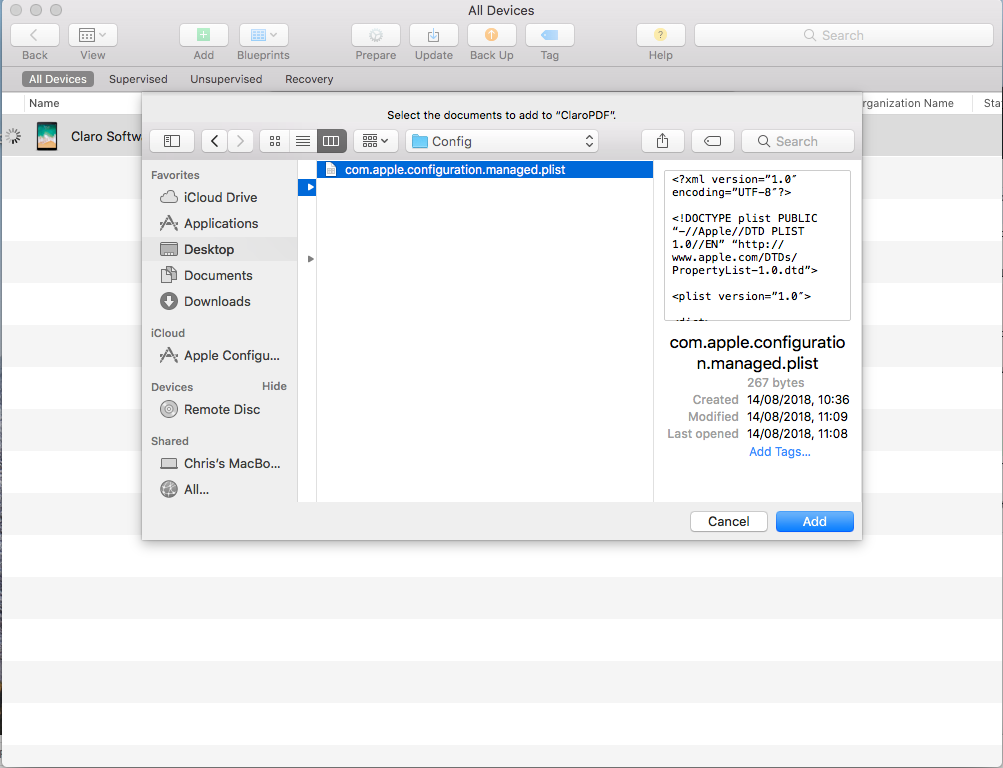
Your MDM may not support custom payloads, so an alternative distribution method that you can use is to push the plist file to the apps Documents directory. To do this, ensure that the configured plist file has the exact name com.apple.configuration.managed and has the file extension .plist.
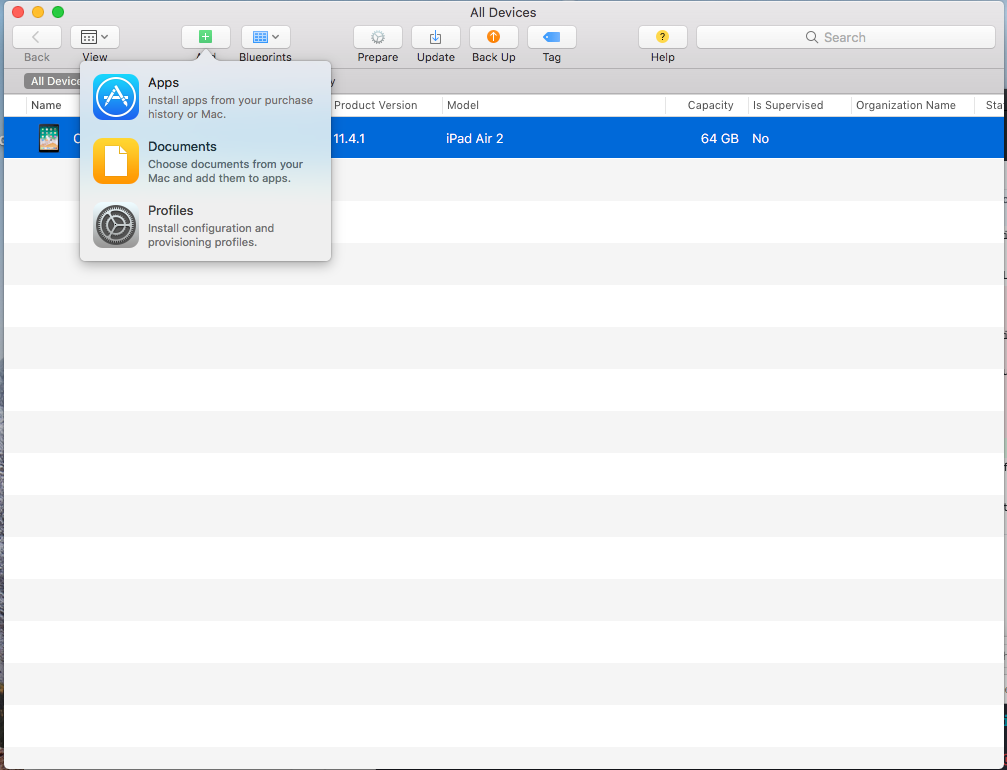
Then in your MDM, (Apple Configuration is shown here), select the device(s) you wish to configure, and choose to add new documents to the device:

Add new documents
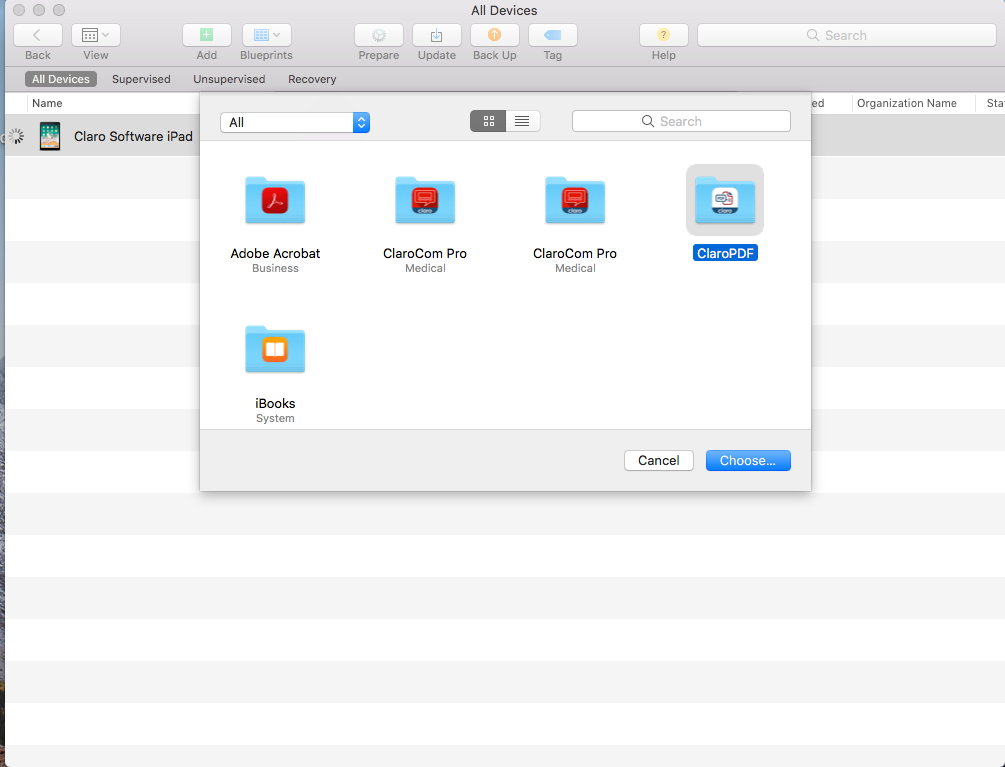
Then select the app you wish to configure:

Select app
And the finally, choose the configured plist file with the exact name com.apple.configuration.managed.plist:

Choose plist file
Logging in
Once the new settings have been pushed to the app, the user can login automatically. Inside the iOS app, there’ll be a menu button called “Login”. Tap “Login” and then you’ll see a popup menu with the option to login automatically or manually. Tap automatically and the app will login automatically with the credentials you provided in the settings .plist. file.