First, provision your own administrator account. Then decide how to provision your users (staff and/or students).
Step 1: Provision your own administrator account
You should have received a Claro Software Licence Key (or Product Code) for the apps and services you want to use. Contact sales@clarosoftware.com if you haven’t.
Now you must log in to Claro Cloud to enable Cloud. You have two mechanisms:
If you have a username and password:
Go to www.clarosoftware.com/login and enter your username and password
Supply an email address (for resetting your password if you lose it).
If you only have a licence key:
Go to www.clarosoftware.com/login and create a Claro Cloud account. We recommend using a work email address corresponding to your institution domain name, e.g. admin@westhaven.eu for www.westhaven.edu. You will have to give the email address and password to anyone responsible for administering the Cloud account.
Now you must enter your Claro Cloud Licence Key to unlock the services and apps for this licence key.
You can log in again any time to see usage information for your institution and staff, add more keys to unlock more services and apps, or administer services for your users.
Step 2: Tell us your domain
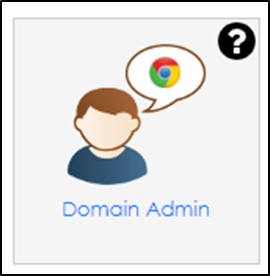
Now click on Domain Admin and tell us what your domain is. This is the bit after the @ symbol in your email, for example for “alasdair@westhaven.edu” then “westhaven.edu” is the domain.

Enter your domain and also your Identify Provider: this is probably going to be Google if you are a school (you all use GMail) but might be Office 365 if you are a business (you all use Outlook).
Now you’ve done that, everyone logged in with an email that has that domain is able to access all our software and service! However, not everyone knows how to log on, or is on a Chromebook where this is automatic, so you need to think about what you want to provision.
Step 3: Provision your users (if necessary)
If your users are using the ClaroRead Chrome or ClaroRead Edge extension then there is nothing to do here: you just have to get the extension out to the end user, they have to be signed in with their school or work email and it will all just work.
Otherwise you have two options. You can simply create a username and password to give out to anyone who needs it, or you can use SSO (Single Sign On).
1 Distribute a username and password to your end users (recommended for iOS Apps)
You may find it simpler to have a username and password to give out to your users. You can get this from your admin Cloud account.
Click on Student and Staff Access.
Set the password you want to use and (optionally) change the default username.
Click Submit.
You can now simply give the username and password to your staff and students:
If they install ClaroRead Chrome or ClaroRead Edge from their Web Stores then they can unlock them with this username and password.
If they install ClaroRead Windows or Mac or Writing Helper from the downloads page then they can click Sign In and put in the username and password to unlock the software.
If they install the free Claro Software iOS Apps from the App Store then they can unlock them with this username and password.
If they use our Web Apps you can point them at the Claro Cloud login page at https://www.clarosoftware.com/login. When they log in they will see downloads and web apps but not all your admin functions.
2 Using Single Sign On (SSO)
This option is available if you use Google or Office 365 as your Identity Provider.
If you do, you can simply instruct your users to sign in with their normal work or college account. You will have to log in first to tell Claro Cloud that the email domain for your users is associated with Google or Office 365, then you are good to go!